# What is Novacura Flow?
## Business **p**rocess management platform for every ERP
With Flow, you can turn your business processes into simple, user-friendly, repeatable applications that put the right data in the right place at the right time. You don’t have to make compromises between your processes and your business systems. With Novacura Flow, your systems and processes are completely in sync—and completely adaptable.
### Put your processes to work
Instead of just mapping your processes and forgetting about them, Novacura Flow helps you turn your business processes into functional, user-friendly apps—apps you can use to manage every part of your business, from complex manufacturing processes to employee on-boarding, customer invoicing, warehouse management and beyond. The results? Happier workers, less data entry errors and increased productivity.
### Build powerful applications
With the Novacura Flow business process management platform, you can create all sorts of enterprise applications to use in your business. Turn your processes and workflows into multi-user applications, run tasks in parallel, use sub-workflows, send push notifications, create components that can be reused and much more. Your user-friendly Flow apps work on practically every device: tablets, mobile phones, laptops, PCs, barcode scanners, handheld terminals and more. They work both online and offline, so you’re not dependent on a WiFi signal. And you can test-run your apps directly inside the Flow Studio, which radically reduces the time from idea to implementation.
### Connect everything together
Flow acts as a [layer on top of your existing business systems](https://www.novacura.com/the-novacura-layer/): a layer containing all your business processes, where you can connect your people, processes and technology exactly how you want to. Novacura Flow can connect to almost any program, database, web service, IOT hub, cloud service or business system. We currently support API, SOAP, REST and many other connectors. And if there’s a connector you’d like us to add? All you have to do is ask. We’re adding [new connectors all the time](https://www.novacura.com/novacura-flow-connectors/).
# System requirements
For Novacura Flow server and Novacura Flow web client
## :dvd: **Operating system**
* Windows Server 2008 R2
* Windows Server 2012
* Windows Server 2012 R2
* Windows Server 2016
* Windows Server 2019
## **Server roles and features**
* .NET Framework 4.6.1
* Internet Information Services (IIS) v7.5 or higher
* Web Server (IIS) -> Web Server -> Application Development:
* .NET Extensibility 4.5
* Application Initialization
* ASP
* ASP.NET 4.5
* HTTP Activation (found under .Net Framework 4.5 Features -> WCF Services)
* Microsoft Visual C++ 2010 Redistributable
* Internet Information Services - World Wide Web Services - Common HTTP Features:
* Static Content
## :computer: Hardware recommendations
The hardware required for a Novacura Flow installation depends on many factors, including the number of concurrent processes, the amount of data processed by the workflows, and the frequency of calls to third-party systems.
### Memory
The amount of RAM used by the Flow Server or Web Client varies depending on usage. The software depends on RAM caches to speed frequent look-up operations; a high RAM for the server process is not necessarily a sign that more memory needs to be added.
**Recommendation:** 4 to 8 GB. (Up to 16 GB if Web Client and Server are installed on the same machine.)
### Disk
A fast disk will speed up some operations in the Novacura Flow Server and Web Client. This is true especially for workflows that handle large data sets or files. There may be some delay before disk space is freed, so it is normal to see a build-up of disk space usage in the initial stage of Novacura Flow Server usage.
**Recommendation:** 20+ GB of disk space available.
### CPU
The Novacura Flow Server and Web Client are hosted in Microsoft IIS, making use of its threading and process model. Performance scalability is improved as clock speeds and number of cores increases.
**Recommendation:** At least 2 GHz clock speed, at least 4 cores (8 if Web Client and Server are installed on the same machine).
### License requirements
The address need to be reachable from the machine where the Novacura Flow is installed, so the Novacura Flow service can call home and check if the license is valid. If it is not possible to open up for , the license will need to be manually updated through the Novacura Flow studio every month.
## :map: Clients
* **Android Client**, requires Android version 5.0 or higher.
* **iOS Client**, requires any of the latest two major versions of iOS.
* **Web Client**, requires IE 10 or newer, Google Chrome, Firefox, Microsoft Edge browser.
* **Windows CE Client**, requires version 5.0 or newer with .NET Compact Framework 3.5.
* **Windows 10 Client**, requires computers, tablets or mobile phones running Windows 10.
* **Portal**, requires IE 10 or newer, Google Chrome, Firefox, Microsoft Edge browser.
* **Portal 2**, requires Google Chrome or Firefox.
### Scanning devices
Definition of support:
* **FULL SUPPORT**: We can scan in all applicable controls (text inputs, list selections, etc.). The workflow moves forward automatically when appropriate.
* **LIMITED SUPPORT**: We can scan in text inputs. The workflow does not move forward automatically, and scanning may not work in list selections and other non-textual controls.
* **NO SUPPORT**: Scanning will not work at all.
Support for different kind of scanners:
* **Android**
* Honeywell CT50: FULL SUPPORT
* Zebra scanning devices supported in fig 1: FULL SUPPORT
* All scanners which support keyboard wedge with semicolon character as pre-and postfix *and* send the scanned characters as key events: FULL SUPPORT.
* All scanners which support keyboard wedge: LIMITED SUPPORT.
* **iOS**
* Linea Pro: FULL SUPPORT.
* All scanners which support keyboard wedge (scanning into any application): LIMITED SUPPORT.
* Other scanners which do not support keyboard wedge: NO SUPPORT
* **Windows CE**
* All scanners which support keyboard wedge with a configurable pre- and postfix: FULL SUPPORT.
* Scanners with keyboard wedge but no configurable pre- and/or postfix: LIMITED SUPPORT.
* **Web**
* All scanners which support keyboard wedge with return/carriage return as postfix *and* send the scanned characters as key events: FULL SUPPORT
* All scanners which support keyboard wedge: LIMITED SUPPORT.
**Device/Os compability chart for Zebra for Android scanning**
The following devices has been tested by Symbol/Zebra and is officially supported according to: [Zebra Support Site](https://www.zebra.com/us/en/support-downloads/software/developer-tools/emdk-for-android.html)
| Device | Android KitKat | Android Lollipop | Android Marshmallow | Android Nougat |
| --------- | -------------- | ---------------- | ------------------- | -------------- |
| CC5000-10 | | x | | |
| ET5X | | x | x | |
| MC18 | x | x | | |
| MC32 | | x | | |
| MC33 | | | | x |
| MC40 | x | x | | |
| MC67 | x | | | |
| MC92 | x | | | |
| TC20 | | | | x |
| TC25 | | | | x |
| TC51 | | | x | x |
| TC55 | x | | | |
| TC56 | | | x | x |
| TC70 | x | x | | |
| TC70x | | | x | x |
| TC75 | x | x | | |
| TC75x | | | x | x |
| TC8000 | x | x | | |
| VC80x | | | | x |
| WT6000 | | x | | |
*fig 1*
All devices requires at least version 6.7.10.1010 or higher of Zebra EMDKSERVICE on the device. Lower versions of EMDKSERVICE than this has limited scanning usability. Also note that Novacura Flow Android Client requires Android Lollipop or higher, which means supported Android KitKat devices will work with other scanning but will not run Novacura Flow client.
From version 6.10 for Zebra, the Data Wedge is used to control and execute scanning.
If upgrading to 6.10 and using the flow client preferences for scanner specific settings, please note that these must be moved to the data wedge application.
# 🎉Release notes
6.11
{% hint style="danger" %}
Flow 6.11 is no longer supported. We strongly advise upgrading to the latest supported version for improved functionality, security, and support services.
{% endhint %}
## Introduction
We’re pleased to announce the launch of a new feature in Flow 6.11: Flow Print. With Flow Print, you can print text and signatures right from Novacura Flow. We’ve also added an external app launcher so you can launch other appsright from your workflows.
Read on for all the details!
## Systemrequirements
No changedor new system requirements in this release.
## New Features
### New App: Flow Print
With Flow Print, you can print text and signatures right from Novacura Flow. This makes it easy for people out in the field to update invoices, collect signatures and print receipts—all from within the Flow app. Flow Print connects to printers via Bluetooth, so it works for both online and offline flows.
#### How to use Flow Print:
#### Studio
1. Build the ZPL layout in Flow Scriptelements
2. Use the External App Launcher object in User Step
3. Map the URIs
4. Add input variable just build in Flow Script
5. Add callback keys where applicable
#### App
1. Download the Flow Print app(for iOS or Android)
2. Go to set up and search for available printers (make sure your printer is switched on)
3. Select your printer
4. Flow Print is now ready to go!
[Watch this video for more details.](https://www.youtube.com/watch?v=XO2a24WBmoQ\&feature=youtu.be)
## Studio Improvements
New user step object: External App Launcher
Use the External App launcher to launch an external app like Flow Print or Google Maps directly from a workflow.
!\[A screenshot of a cell phone
Description automatically generated]\()
## Improved navigation
We’ve made some improvements to the navigation elements in Flow Studio:
|
Tab: move down to next field
Tab + Shift: move up to previous next field
Arrow down language field: opens the language box
Tab language box: go to next language
Enter language box: close the box
|  |
| --------------------------------------------------------------------------------------------------------------------------------------------------------------------------------------------------------------------------------------------------------- | ------------------------------------------------------------------------------------------------------------------------------------------------------------------------------------------------------------------------------------------------------------------------- |
## Icon for Flow Script dialog window
Click F11 or in the icon to open flow script dialog window.

## New item step: Import and Export Data
This new feature allows you to import and export of data to and from the workflow Table element.

#### Import
* The allowed import formats are tab, semi colon and colon.
* The header must be one word and no special characters are allowed.
### Export
* The export format is csv only.
## Reports
From Studio, you can now extract information about roles, users, connectors and workflow changes and then save your report in csv format.

## Flow Client
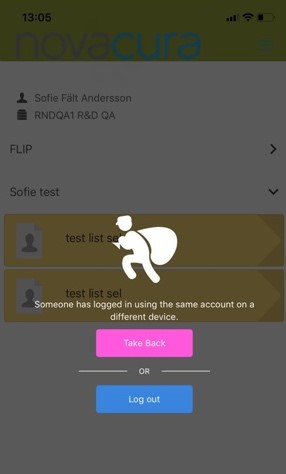
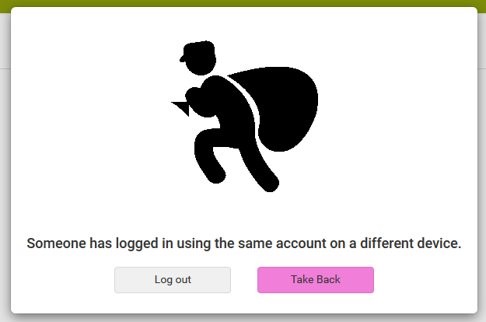
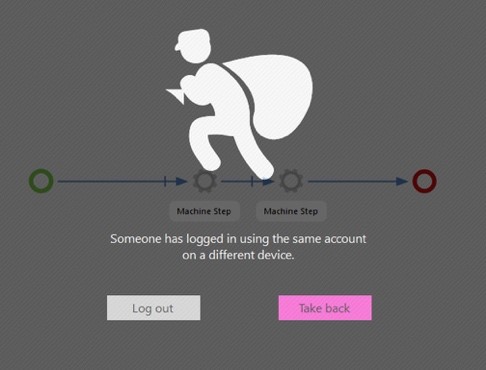
No more thief countdown
When a user is logging in on another device, you can now immediately take back the session. This is applicable for all clients.
## Android UI changes
* standardized font and font size
* standardized margins
* changes look of input fields
* changed look of menu selection
* standardized and changed icons
!\[A screenshot of a cell phone
Description automatically generated]\()
# Quick start
This page summarizes all the essentials you will need to know to start creating apps with Novacura Flow. Here you can find all best practices and tips to create and run your first app!
## Installation
The apps is developed with the Flow studio, and the Flow studio must be connected to a Flow server. Follow below instructions to install your Flow server and Flow studio so you can start developing your own business apps.
{% hint style="info" %}
**Tip:** Check out the [system requirements](/6.11/system-requirements) before the start of the installation 😊
{% endhint %}
### Flow server
[Download](https://home.novacuraflow.com/Downloads/flow%206/latest/Novacura%20Flow%20Server%20Manager%20Installer.exe) and install the server tool, when that is done, do a new installation of the Flow server and components.
**Quick installation guide:**
{% tabs %}
{% tab title="Step 1" %}

{% endtab %}
{% tab title="Step 2" %}

* Click on the menu in the top right corner and choose *Install new*.
{% endtab %}
{% tab title="Step 3" %}

* Choose what Novacura Flow version to install.
* Choose the component/s that should be installed
{% endtab %}
{% tab title="Step 4" %}

* Create a new *Site* in the *Internet Information Services (IIS)* by clicking on *New\...*.
* Enter *Environment name*, for example: Novacura Flow.
* For *Install directory*, browse to the intended folder.
* For *Storage directory*, browse to the intended folder.
{% endtab %}
{% tab title="Step 5" %}

* Enter a *Admin user name*, use this user to log in to the *Novacura Flow Studio*.
* Enter a *Password* for the *Admin user*.
* Select wanted security options.
* Click on *Install* to start the installation.
{% endtab %}
{% tab title="Done" %}

* The installation will be listed here when the installation is successfull
{% endtab %}
{% endtabs %}
**Find a more detailed installation guide here:**
{% content-ref url="/pages/-LtPfxwuDfrda5WEbrp4" %}
[New installation](/6.11/installation-and-upgrade/new-installation)
{% endcontent-ref %}
### Flow studio
The Studio launcher supporting launching of different Flow studio versions, so it is easy to connect to different Flow servers, even though the Flow servers have different versions, you don't even have to know which version you are connecting to, the studio launcher takes care of all this, including downloading new versions and updates of the Flow studio.
[Download](https://home.novacuraflow.com/Downloads/flow%206/latest/Novacura%20Flow%20Studio.exe) and install the Flow studio launcher, when that is done, enter the Flow server url or pin code, username and password, and log in.
{% hint style="info" %}
**Tip:** The pin code can be found on the server page, just browse to the server url in a web browser 🌎
{% endhint %}

**Find more information about the Flow studio installation and log in here:**
{% content-ref url="/pages/-LuPStifUgB7SWEHwcrA" %}
[Installation and log in](/6.11/development/flow-studio/installation-and-login)
{% endcontent-ref %}
## Users
Users is added under Environment -> Users.
There is three levels of access; AdministerBasicData, AdministerWorkflows and Work, **AdministerBasicData:** Have permisson to the complete studio and can run clients\
**AdministerWorkflows:** Have permisson to the application tab of studio and can run clients\
**Work:** Can only run clients
{% hint style="info" %}
AdministerBasicData and AdministerWorkflows can only access the studio as full users
{% endhint %}
Enter name of the user and a user id, choose the type of the user.\
\
**User types:**
* **Full user:** A full user can log in and run all licensed clients including the portal.
* **Workflow user:** A worklow user will only have permission to run specific granted workflows.
* **Machine user:** A machine user can only run machine workflows, read more about machine workflows [here](/6.11/development/flow-studio/applications/workflow).
* **Transaction user:** For every workflow that is started will a transaction be counted.
* **Portal user:** A portal user will only have permission to log in to the portal client.
* **Public user:** A public user can run a workflow without the need to log in.
* **App user:** A user type for application packages.
**Password,** is optional becouse it is possible to authenticate through a connector, AD or openID.
**Read more about users here:**
{% content-ref url="/pages/-LucCtMtJ8mZrRqHFrtI" %}
[Users](/6.11/development/flow-studio/environment/users)
{% endcontent-ref %}
## App permissions
Workflows and inboxes are added into menus, roles are connected to menus and users get roles, and by that users getting access to workflows and inboxes.
**Go to Environment -> roles.**
* Add a new roles group, enter group id and group name
* Add roles to the group, click on the + button to add a role.
**Go to Environment -> users.**
* Find the user and click on edit under role tags.
* Select the role that was created, and click OK.
* Click save.
**Go to Applications -> server content.**
* Right click in the server content area, choose new\... -> menu.
* Enter a title for the menu.
* Click on edit roles and select the role that was created.
Now the user can run all apps connected to the menu. \
A quick guide to create your first app can be found here:
{% content-ref url="/pages/-LzCQ2qvmJrTX0DOff0f" %}
[Develop your first app](/6.11/getting-started/develop-your-first-app)
{% endcontent-ref %}
# Develop your first app
Here is a guide for how to create a simple app.
The app will allow the end-user to create an issue report that will be saved to a database.
As a Flow designer you will get to know how to:
* Create a new workflow
* Create a first user step where the user can enter data
* Fetch and use data from a database
* Insert data to a database
* Publish an app
You will need an SQL server database to complete this app, download the database [here](https://home.novacuraflow.com/Downloads/Help/Training_Database.zip).
## :ocean: Create a workflow
[Log in to Flow studio](/6.11/getting-started/quick-start#flow-studio), and create a new workflow:
Click on *File* and choose *New*.

## :footprints: First step
1. Create the first step by right clicking on the green start step and choose *Add sequence arrow.*
2. Right-click again and choose *Create user step.*
3. Enter a suitable name for the user step label.
4. Double-click on the User step to enter the user step editor.
1. Drag a *Header* object in to the center of the user step editor.
2. Enter a text in the header, e.g. Welcome.
3. Drag in a *Text input* field.
4. Enter a prompt text, e.g. Enter name.
5. Enter a target variable, e.g. Name.
6. Drag in another *Text input* field and enter a prompt and a target value for email adderss.
7. Click OK to save your changes.
{% hint style="info" %}
**Tips:** Use the test bench to verify what you have done.
Start the test bench by clicking on the play button in the right corner or use the keyboard shortcut Ctrl+Enter.
{% endhint %}

## :satellite: Get data
1. Right click and choose *Create machine step.*
2. Right click on the Machine step and choose *Add data arrow,* connect the data arrow with the User step.
3. Double-click on the Machine step to open the machine step editor.
4. Select connector in the dropdown list.
5. Select database call type and enter the query.
6. Enter a variable name, e.g. DS\_issueTypes.
7. Click OK to save your changes.
{% hint style="info" %}
**Tip:** Use the magic wand to beautify the sql script in the machine step.:man\_mage:
{% endhint %}

#### Code to use:
```sql
SELECT [TYPE] "TYPE"
FROM [dbo].[IssueType]
```
Open the User step and configure a list to show the issue types.
1. Drag in a *Menu selection input.*
2. Enter a target variable for the output, e.g. issueType.
3. Select table variable DS\_issueTypes as data source.
4. Enter a prompt, e.g. Select issue type.
5. Enter row text, type a { to get a list of available variables, choose the TYPE variable.
6. Choose TYPE as *Field to select*, and select *Show empty option*.
7. Drag in a *Text input* field.
8. Enter a prompt text, e.g. Enter issue description.
9. Enter a target variable, e.g. issueDesc.
10. Select multiline.
11. Click OK to save your changes.
{% hint style="info" %}
**Tips:** Use the test bench to verify what you have done.
Start the test bench by clicking on the play button in the right corner or use the keyboard shortcut Ctrl+Enter.
{% endhint %}

## :seedling: Use variables
1. Add another machine step, you can drag and drop a machine step from the Workflow elements area or right-click in the workflow area and select *Create machine step*.
2. Use a *sequence arrow* and connect first user step with the machine step you just added*.*
3. Double-click on the machine step to enter the machine step editor.
4. Select connector in the dropdown list. The database call type should be set to script.
5. Enter your sql script, enter a { to get a list of available variables, choose the name variable, do the same for the other variables.
6. Click OK to save your changes.
{% hint style="info" %}
**Tip:** Write *@out\_* to create an output variable for scripts. You can add several *@out\_* to add more values to the output record.
{% endhint %}

#### Code to use:
```sql
INSERT INTO [WorkOrder]
([NAME]
,[EMAIL]
,[ISSUE_TYPE]
,[ISSUE_DESC]
,[REPORT_DATE]
,[STATUS])
VALUES
(@name
,@email
,@issueType
,@issueDesc
,GETDATE()
,'New')
SET @out_issueNumber = SCOPE_IDENTITY()
```
Add another user step, add one header and one static text field with information about the issue number. \
Enter a { to get a list of available variables, choose the issueNumber variable.
{% hint style="info" %}
**Tip:** Click on the wrench icon:wrench:(Route 1) to change the button name to a more suitable name so the user understands what will happen when clicking on the button.
{% endhint %}

## :handshake: Commit and publish
An app must be published to be available in the Flow clients.
1. Commit the app by clicking on the check mark in the top left corner of the workflow area.
2. Leave a comment that describes the change that were made, and click on *Commit*.
3. Finally publish the workflow by clicking on the (space ship) *Publish* button.
{% hint style="info" %}
For each commit a version will be created, all versions will be listed in the *Version history* panel. Open an old version by double-clicking on a version in the *Version history* panel.
{% endhint %}

## :briefcase: Add to menu
1. Create a menu, right-click in the server content area and choose New -> Menu.
2. Enter a *Title* for the menu.
3. Click on the + and choose *Workflow item,* select your workflow.
4. Click on *Edit roles* in the bottom corner of the menu and check the roles that should have permission to the menu. Learn how to setup a role [here](/6.11/getting-started/quick-start#app-permissions).
The app is now ready to run in any Flow client.

## :carousel\_horse: Run the app
You can run all apps in the Flow clients on iOS, Android, Windows 10 and Web. You can download the Flow client app from Google store, App store and Microsoft store.
1. Open the Flow client app, connect to your Flow server and enter username and password.
2. When you are logged in, you will see the app under the menu tab, click on the app to start.
3. Fill in the fields and click *OK*, cancel the execution by clicking the *Quit* button.
{% hint style="info" %}
**Tip**: If your app doesn't appear in the client, check that the **menu** and **user** is assigned to the correct role.
{% endhint %}

# Installation
Use the Novacura Flow server management tool to do new Flow server installation, upgrade and apply service packs.\
The differnce between an upgrade and a service pack is that can upgrade is between minor version like 6.2 to 6.3 and a service pack is always within the minor release like 6.2.3 and 6.2.7.
#### Upgrade
An upgrade includes new features and corrections and can change the structure of the Flow database. All Flow clients need to be updated to the same version as the Flow server.
#### Service pack
A service pack only includes corrections that is suitable for patching. A patch will for example not change the database structure of the internal Flow database.

# New installation
Before you start the installation make sure the [System requirements](/6.11/system-requirements) are fulfilled and that is accessible from the server.
The installation can either be done online or offline.\
**Online:** The installation files will automatically be downloaded by the Novacura Flow Server Manager tool.\
**Offline:** The installation files need to be downloaded separately and added manually in the Novacura Flow Server Manager tool. Observe this is only necessary if for any reason can not be accessible.
**1.** Download the *Novacura Flow Server Manager*
* Go to .
* Download the *Novacura Flow Server Manager* and *Novacura Flow Studio*, and place the installation files on the machine where *Novacura Flow Server* should be installed.
* If *Novacura Flow* needs to be installed **offline** download the installation packages for the version you want to install.
* Run the installation for the *Novacura Flow Server Manager Installer.exe*.
**2.** Create an installation folder
* Create a folder named *Novacura*, for example under: C:\\. (all *Novacura Flow* binaries will be placed under this installation folder)
* In the *Novacura* folder, add a folder named *Data*.\
(in the *Data* folder will the *Sql Lite database* be stored, this folder can be placed where data storage is most suitable)

**3.** Open the *Novacura Flow Server Installer Manager*
* Click on the menu in the top right corner and choose *Install new*.
* Choose what Novacura Flow version to install.
* Choose the component/s that should be installed.
* Click *Next*.
{% hint style="info" %}
**Tips:**\
If connection to *Novacura Flow home* is **not** available, then *offline* installation it will be available. Download the offline packages and enter the package for each component that should be installed.
It is possible to add component/s after the installation is done, read more [here](/6.11/installation-and-upgrade/add-component).
Read about the Web authenticator [here](/6.11/installation-and-upgrade/windows-authentication).
{% endhint %}
* Create a new *Site* in the *Internet Information Services (IIS)* by clicking on *New\...*.
* Enter a name for the site, for example: Novacura.
* Enter a port for the site, for example: 80 (open the *Internet Information Services (IIS) Manager* and control so the port that is entered is free to use).
* Enter *Environment name*, for example: Flow.
* Recommended name standard; for test and dev installations include Test or Dev in the beginning of the environment name, such as "Test Flow" or "Dev Flow", so the different environments are easy to distinguish for the end-user.
* For *Install directory*, browse to the Novacura folder that was created earlier.
* For *Storage directory*, browse to the Data folder that was created earlier.
* Click *Next*.
* The *External URL* should already be filled in.
* The *Server name* should already be filled in.
* Enter a *Help e-mail address*, the e-mail could be to a technical person who is responsible for the *Novacura Flow installation*.
* Enter a *Admin user name*, use this user to log in to the *Novacura Flow Studio*.
* Enter a *Password* for the *Admin user*.
* Check any of the security options *Use Device Management*, *Force Web Login*, *Block Flow Studio requests...* if needed. You can also change these settings, using the action menu *Edit Installation Settings* on the installation, at any time after the installation is made.
* *Use Device Management*: Having this option checked will force all devices to be approved before a User can log in. It will also enable Device Management in the Flow Studio, where new devices can be approved or denied and existing devices can be Blocked.
* *Force Web Login*: Having this option checked will force Users to log in every time they access Novacura Flow through the Web Client.
* *Block Flow Studio requests outside the local network*: Enabling this option will prevent all external access to the Flow Studio. Only requests from the local network will be accepted. You can however define exceptions in order to allow requests from specific IP addresses. If needed, these addresses should be listsed in the Exception list.
* Click *Install*.
**4.** The installation is done and all installations will be listed in the *Novacura Flow Server Manager*
* Open the Novacura Flow Server page. The page should show the version, bar code and pin code.
* Open the Novacura Flow Web Client. The page should show a log in prompt.
* Install Novacura Flow Studio and connect to the Novacura Flow Server. Log in with the admin user that was enter during the installation. When logged in to the Novacura Flow Studio go to Environment -> License and request either a demo license or a customer license, read more here: [License](/6.11/development/flow-studio/environment/license).
* If the Novacura Flow portal was installed, open the portal application to to finish the portal installation. The portal database will be created when the portal application is open for the first time. When the installation is done will the login page appear.

The Novacura Flow Server Manager will list each installation on the machine. If another installation is needed click on *Install new* and follow the installation guide again. Use the Novacura Flow server manager to [upgrade](/6.11/installation-and-upgrade/upgrade-installation) the Flow server to a new version or [apply service packs](/6.11/installation-and-upgrade/apply-service-pack).

\
*Contact for support if the installation fails.*
# Upgrade installation
Before you start the upgrade installation make sure the [System requirements ](/6.11/system-requirements)are fulfilled, and that is accessible from the server.
{% hint style="info" %}
The system will be unavailable during the installation process.
{% endhint %}
{% hint style="success" %}
A recommendation, is to restart server prior to upgrade.
{% endhint %}
The installation can either be done online or offline.\
**Online:** The installation files will automatically be downloaded by the Novacura Flow Server Manager tool.\
**Offline:** The installation files need to be downloaded separately and added manually in the Novacura Flow Server Manager tool. Observe this is only necessary if for any reason can not be accessible.
**1.** Latest version of the *Novacura Flow Server Manager*
Use always the latest version of the *Novacura Flow Server Manager*.
**Online:**
* From version 6.2 is the *Novacura Flow Server Manager* self updating. When *Novacura Flow Server Manager* is started will it check for new avaliable versions and show a dialog where it is possible to download and install the latest version.
**Offline:**
* Go to .
* Download the *Novacura Flow Server Manager* and *Novacura Flow Studio*, and place the installation files on the machine where *Novacura Flow Server* should be installed.
* Download the installation package for the version you want to install.
* Run the installation for the new version of *Novacura Flow Server Manager Installer.exe*.

**2.** Take a backup of Novacura Flow
* Take a backup of the database files; find the database files by clicking on the menu and choose *Open storage* for the installation that should be upgraded, copy the files to a backup folder.
* Take a backup of the binaries; find the binaries by clicking on the menu and choose *Open folder* for the installation that should be upgraded, copy the files to a backup folder.
**3.** Upgrade to new version
* Click on the menu for the installation that should be updated and choose *Upgrade...*.
* Click on *Upgrade* to start the update, when message *Upgrade successful* shows is the upgrade done.
* Browse to the the Novacura Flow server page to see that it is up and running.
> If connection to *Novacura Flow home* is **not** available, then it will be possible to do an *offline* upgrade. Download the offline packages and enter each package for the component/s that should be upgraded.

*After the upgrade is done, make sure the mobile clients (iOS, Android, Windows) are updated to the latest version. If not the users won't be able to log into the client*
#### Flow portal upgrade to 6.3 and later
Regarding portal upgrades from Flow versions earlier than 6.3, contact for more information.
#### Problems
If the upgrade process results in a corrupt state, which it can't rollback automatically, an error message "Entry is incorrect. Fix errors or remove entry" will be displayed on the environment instance. This can often be recovered manually by:
* Go to the installation folder and change the name of the data backup that the installation tool have done.
* Remove the underscore and date from the folder name of each component installation folder (see example image below).
* Start the site and service from IIS Manager.
* Open the Novacura Flow server page to see that it is up and running.
*Contact for support if the upgrade fails.*
# Apply service pack
{% hint style="info" %}
The system will be unavailable during the installation process.
{% endhint %}
{% hint style="success" %}
A recommendation, is to restart server prior to upgrade.
{% endhint %}
**1.** Take a backup
* Take a backup of the installation folder with all files for all components of Novacura Flow.
**2.** Open the *Novacura Flow Server Manager*
* Click on the menu for the installation that should be updated and choose *Apply service pack...*.
* Click on *Apply* to start the update, when message *Upgrade successful* shows is the service pack applied.

**3.** Problems If the upgrade process results in a corrupt state, which it can't rollback automatically, an error message "Entry is incorrect. Fix errors or remove entry" will be displayed on the environment instance. This can often be recovered manually by:
* Go to the installation folder and change the name of the data backup that the installation tool have done.
* Remove the underscore and date from the folder name of each component installation folder (see example image below).
* Start the site and service from IIS Manager.
* Open the Novacura Flow server page to see that it is up and running.
\
*Contact for support if the upgrade fails.*
# Add component
Before you start the installation make sure the [System requirements](/6.11/system-requirements) are fulfilled and that is accessible from the server.
The installation can either be done online or offline.\
**Online:** The installation files will automatically be downloaded by the Novacura Flow Server Manager tool.\
**Offline:** The installation files need to be downloaded separately and added manually in the Novacura Flow Server Manager tool. Observe this is only necessary if for any reason can not be accessible.
**1.** Open the *Novacura Flow Server Manager*
* Click on the menu for the installation that the component/s should be added to.
* Choose Add Component...
* Choose the component/s that should be installed.
* Click *Install*.
{% hint style="info" %}
If connection to *Novacura Flow home* is **not** available, then *offline* installation it will be available. Download the offline packages and enter the package for each component that should be installed.
{% endhint %}

{% hint style="info" %}
When Portal 2 is added, the base URL must be entered. :jigsaw:
**Enter the base URL like:** \
E.g. [https://myserveraddress](https://address) or [http://myserveraddress:80](http://serveraddress:80),\
like, or .
{% endhint %}
**2.** The installation is done and the component/s is added to installation
* If the Novacura Flow Web Client was installed. Open the Novacura Flow Web Client. The page should show a log in prompt.
* If the Novacura Flow portal was installed, open the portal application to to finish the portal installation. The portal database will be created when the portal application is open for the first time. When the installation is done will the login page appear.

# Windows authentication
For Novacura Flow web client or portal
The *Flow User Id* need to be the same as in the *Active Directory* to be able to use *Windows Authentication*. Use the [Active directory sync](/6.11/development/flow-studio/environment/active-directory-sync) in the *Environment* part of the *Flow Studio* to easily import users from the *Active Directory*.
**1.** Enable *Windows Authentication*
* Click on the Web.Authenticator application under the site
* Double click on *Authentication*
* Enable *Windows Authentication* and disable all other authentications\
If *Windows Authentication* is missing in the list of authentications; go to the *Server Manager* and click on *Add roles and features*. Click on *Next* until the *Server roles* tab, extract *Web Server (IIS)*, *Web Server*, *Security* and check *Windows Authentication*, click on *Next* until installation.

**2.** Control the configuration of the *Web Authenticator*
* Open the folder for the *Web Authenticator* (C:\Novacura\Novacura Flow 6\WebAuth)
* Right click and edit the Web.config file
* Change the value for key **flowServerAddress** to the full *Flow Server* address, for example:\
\](http://servername:80/Novacura.Flow.6.Server/">)
* Open the folder for the *Web Client and/or portal*
* Right click and edit the Web.config file
* Change the value for key **flowWebAuthenticator** to the *Flow Web Authenticator* address, for example:\
\](http://servername:80/Novacura.Flow.Client.Web.Authenticator">)
* Save the changes and close the files
**3.** The installation of the *Windows Authentication* for the *Flow Web Client / Portal* is now done. The users can log on with *Windows Authentication* in the *Flow Web Client / Portal* if they click on *Sign in with your Microsoft Windows domain account*.

# Event log
As of Flow 6.6, system security events will be logged and possible to view in the Windows Event Viewer.
A log, NCFLog, is created under Applications and Services Logs.
The following applications are supported:
* Flow Studio Application
* Client - Web Application and Mobile Applications (iOS, Android, UWP)
* Portal Application

### Types of Events
The following types of events will be logged:
1. USER\_CREATED
* Event Id - 1
* Parameters: Login, Access Level, Type, Roles
2. USER\_UPDATED
* Event Id - 2
* Parameters: Login, Access Level, Type, Roles
3. USER\_DELETED
* Event Id - 3
* Parameters: Login
4. USER\_LOGGED\_IN
* Event Id - 4
* Parameters: Login
5. USER\_LOGGED\_OUT
* Event Id - 5
* Parameters: Login
6. ACCESS\_DENIED
* Event Id - 6
* Parameters: Login
7. DEVICE\_APPROVED
* Event Id - 7
* Parameters: Device Id, Device Name, Last user login
8. DEVICE\_BLOCKED
* Event Id - 8
* Parameters: Device Id, Device Name, Last user login
9. MENU\_CHANGE
* Event Id - 9
* Parameters: Menu name, Roles
10. ROLES\_CHANGE
* Event Id - 10
* Parameters: Login, Roles
11. PASSWORD\_CHANGE
* Event Id - 11
* Parameters: Login
# FAQ
# Monitoring
It can be good to monitor the crucial parts of the Flow server.
The parts of the Flow server that are recommended to monitor:
**IIS components:**
* Flow site
* Flow application pools
**Windows service:**
* Flow service
# Troubleshooting
If there is problems with the Flow server, clients or other Flow related products, please contact us at and attach log files or other related files.
### App pool and sites
If the server stops responding there might be something wrong with the applications running on the app pools or something wrong with the site.
1\. Navigate to the IIS -> Servername -> Application Pools.
2\. Select the Novacura application pool(s), on the right side select recycle or start it up if it's not running.

3\. Navigate to Sites and select the site where the Novacura server is running, on the right side select restart if it's not responding or start if it's not running.

4\. Verify that the server is now up and responding again.
If the application pool stops regularly please contact us so we can investigate it. Meanwhile, a workaround is to raise the amount of errors the server can receive before it automatically stops the site by following these steps:
1. Navigate to the IIS -> Server name -> Application Pools.
2. Right-click on the application pool you wish to raise the amount of errors it can receive.
3. Under "Rapid-Fail Protection" change the failure interval and maximum failures to how many failures during x amount of minutes you want the application pool to allow.
### Fetch custom event views
If the server stops responding often, crashes or if the server is experiencing any other errors which are hard to specify the cause for, a log containing information about errors occurring could be useful.
To fetch a log containing crash dumps etc. follow these steps:
1. Press windows button + R and type in "eventvwr.msc".
2. Select custom views and click on create custom view.
3. Logged - Specify in which time frame you want to fetch the logs from.
4. Event Level - Select Error, Warning and Critical
5. Select by source and choose all sources you want to fetch messages from, some relevant are: ".Net Runtime, Application Error, ASP.Net 4.0, MSSQL SQLexpress, MSSQL SQLexpress Audit". But it depends on what you wish to view, these mentioned above can help us investigating your error if you report it to us and attach the custom view file.
6. Select the new custom event view you have created, click on "save all events in custom view as..."
7. Choose a name for the file and save it as .evtx, attach this file to your issue when you report them to us if you're having server problems.\
It can both help us identify the problem and allow us to fix the problem faster.
### Fetch a memory dump
If the logs from the IIS and Flow server aren't enough, you can also fetch a memory dump which can help us trace the root cause of the problem you are experiencing.\
By following the instructions in: [Fetch memory dump](https://blogs.msdn.microsoft.com/chaun/2013/11/12/steps-to-catch-a-simple-crash-dump-of-a-crashing-process/) you can fetch the memory dump and send it to us.
Be very careful to fetch the memory dump during the time the error occurs, and not after you have fixed the error or restarted the server etc..
If the bug does not exist in the current session when you fetch the dump, we will not see it.
# Migration tool
Upgrading Flow portal v.5 to v.6
This tool is required if you have migrated your portal from flow 5 to flow 6, but your Flow 6 environment differs from Flow 5.
It supports migrating *Connectors, Workflows, Roles, News Viewer Comments*
**1.** Complete a portal migration by following the steps in: [Upgrade](/6.11/installation-and-upgrade/upgrade-installation)
**2.** Open the Migration Tool folder
Set up the Migrate5To6.exe.config file with:
* Appsettings
* ssoCommonSecret: enter {ssoCommonSecret} found in your novacura flow server web.config file.
* serverLogin value: flow user with portal admin rights".
* ConnectionStrings
* Data Source: Path to the the 5 Portal sql server.
* Initial Catalog: Name of the 5 Portal database.
* user id: login to access database.
* password: password to the user id.
* The second connection string also needs to be configured, it works the same way but it's the receiving end. Which means here you type in the portal 6 server/database.
* Client
* Endpoint address: change everything before /PortalAPI to your novacura flow server e.g ""
Do the same for both endpoint addresses in Client and save your modified .config file

**3.** Migrate portal 5 to portal 6
Run the Migrate5To6.exe tool
Click on Test flow 5 DB and Test Portal 6 db to make sure the .config file is set up correctly.
**Migrating Connectors**
1. Click on Load Flow 5 Connectors And Load Flow 6 Connectors
2. Choose the flow 5 connector that is being used somewhere in the flow 5 portal.
3. Choose the corresponding flow 6 connector that should be used in the flow 6 portal.
4. Click on the >> button to map the connectors.
5. Repeat this for every connector you wish to migrate and map to flow 6.

**Migrating Roles**
1. Click on Load Flow 5 Roles And Load Flow 6 Roles
2. Choose the flow 5 role that is being used somewhere in the flow 5 portal.
3. Choose the corresponding flow 6 role that should be used in the flow 6 portal.
4. Click on the >> button to map the roles.
5. Repeat this for every role you wish to migrate and map to flow 6.

**Migrating Workflows**
1. Click on Load Flow 5 portlets.
2. Click on Load Flow 6 Workflows.
3. Select a portlet to display the workflows used by the portlet.
4. Select and input which kind of flow 5 workflow and it's parameters in the corresponding text box.
5. Select which flow 6 workflow that corresponds to that operation press the >> button which will fill the necessary text boxes with information.
6. Click on Save Workflows for selected portlet.

**Migrating News Viewer Comments**
1. Click on Find users
2. Click on Save comments users, it can only map when the user names match between environments.
\
*Contact for support if the upgrade fails.*
# IIS user permission
Follow this instruction to give the IIS application pool user read and write permission in a folder

Right click on the folder where the application pool user should have permission. Choose *Properties* and tab *Security*, click *Edit* and then *Add*.
Enter IIS APPPOOL\\*"the name of the Novacura Flow server application pool"* in the object name field.

Click on *Locations* and mark the local machine in the tree structure and click OK.
Click on *Check Names*, if the user name is correct and exists will it get a underline and be change to just the user name and click OK.

Mark the added *Novacura Flow server application pool user* and check *Write* and *Read* permission, click OK.\
\
Now have the *Novacura Flow server application pool user* permission to Read and Write in the folder.
# Moving SQLite portal database
If the portal database is located in the wrong directory will an upgrade not be possible.
To fix this:
1. Locate the Portal database, go to the portal web.config and see tag datapath for the location.
2. Open the Flow server tool and find the data storage for the installation to upgrade; click on the meny for the installation and take Open storage.
3. Copy the Portal database to the installation location.
4. Navigate to the portal web.config and change the datapath to the new data path and save the web.config.
*Contact product support if above does not work for you*
# Server
# Security settings
## Accessing server security settings
Currently, server security settings are accessed and modified through editing the **Web.config** file in the Flow Server installation directory. Any changes saved to this file will cause the Flow Server to restart automatically, ensuring that changes take effect immediately.
{% hint style="warning" %}
Always make a back-up copy of the Web.config file *outside of* the Flow Server installation directory before making any changes to the configuration.
{% endhint %}
## Limiting WAN access to studio functionality
For Flow Server installations that are available on a public IP address, it advisable to turn off access to the Flow Studio APIs. This means that only end-users will be able to connect to the Flow server using non-LAN IP addresses. For access using the Flow studio, only LAN IP addresses are allowed.
To disable WAN Access to studio functionality, navigate to the Web.config file in the Flow server installation directory, then find the configuration key marked **blockStudioIfOutsideLocalNet** and change the value to **true**.
```markup
```
It is possible to configure a set of excepted host names, which will be allowed even if WAN Access is blocked. To configure such exceptions, add the excepted host names as a comma-separated list in the **blockStudioIfOutsideLocalNetExcept** configuration key.
# Studio
With the brand new Novacura Flow Studio we have created a true power tool for creating efficient, user-friendly and integrated apps providing increased growth, higher efficiency and simpler administration.\
And as usual, everything is based on step-by-step workflows. Now you can create multi-user applications, run tasks in parallel, use sub-workflows, send push notifications, get an activity live-feed, create parts of workflows that can be reused and much more. You can even test run your apps directly inside Novacura Flow Studio, something that will radically shorten the time from idea to implementation.
With the simplicity of Novacura Flow Studio, you can go from zero to app in just minutes, as long as you know what you want to achieve - or discover potential achievements you weren't even aware of!
The Novacura Flow Help can be reasched offline from the Novacura Flow Studio. When the Novacura Flow Help opens it will first try to open the online help, if no internet connection is available the offline help will be opened. The offline help will be updated for every new version and the online version will be updated continuously.

# Installation and log in
### Launcher
The Studio launcher supporting launching of different Flow studio versions, so it is easy to connect to different Flow servers, even though the Flow servers have different versions. As a Designer or Administrator, you don't even have to know which version you are connecting to, the Studio launcher takes care of all this, including downloading new versions and updates of the Flow Studio. The Flow Studio launcher can be used with Flow version 6.4 or later.
Download the Studio launcher from [here](http://community.novacuraflow.com/downloads/).\
*Login or create an account to download the Studio launcher.*
#### Installation
Click on *Install* in the studio to be able to see which versions of the studio that are installed, uninstall or update a current version or install a new one. The installation can be done both with and without internet connection.
Install a new version Click on *Install* under preferred flow studio version to install a new version.

A user will be notified when logging in with a server address which doesn't match a version that are installed. Click *yes* to install and log in with the new version and *no* to log in with the current version. The user must be an administrator to do the installation.

Update a current version Click on *update* under preferred flow studio version to update an already installed version.

A user will be notified if a new version is available when logging into the studio. Click "yes" to install and log in with the new version and *no* to log in with the current version.

Uninstall a current version Click on *uninstall* under preferred flow studio version to uninstall a current version.

Install package manually Click on *install package manually* to install a version of flow studio manually. Choose your package and click open

### Log in
Log in to a Flow environment by enter server url or server pin code followed by your credentials. When leaving the *Server* input field a initial connection will be established and url/pin will be replaced by server instance name.
To save a server address, enter the address and click on the star icon and click *Save*. To remove saved server addresses, open the list of saved server addresses and hover over the address you want to delete and press the *Delete*-button on the key board.
Check *"Remember me next time"* if the username should be stored until next login.
> It is possible to run multiple instances of Flow studio and server instance name is shown in title bar.

# OpenID connect
OpenID Connect is an identity layer on top of the OAuth 2.0 protocol. It allows Clients to verify the identity of the end user based on the authentication performed by an Authorization Server, as well as to obtain basic profile information about the end user.
## Set up Studio
### **Requirements**

OpenID Connect is enabled in the Flow Studio.
1. Go to Environment -> OpenID Connect and select Enable.
2. Enter the configuration.
3. Save.
{% hint style="info" %}
When saving configuration, you will need to restart your IIS for the changes to take effect.
{% endhint %}
When OpenID is enabled the normal username/password login is disabled in the mobile clients (iOS, Android) and Windows client.
OpenID login will work for both synchronized users and manually entered users.
### **Configuration**
* **Authority address:** Base URL for the identity provider
* **Client ID:** Unique id for your application. Created in admin part of your identity provider.
* **Scope:** OpenID Connect scopes are used by an application during authentication to authorize access to a user's details, like name and picture. Each scope returns a set of user attributes, which are called claims. Some IdPs require special scopes, for example when using Azure AD you must include the ?user.read? scope.
* **Authentication flow:** Hybrid or Authorization Code.
{% hint style="info" %}
Hybrid is not supported for Universal Windows Client.
{% endhint %}
* **Do not require authorization code hash:** Check this for compatibility with certain IdPs. (Azure needs this checked)
* **Do not require access token hash:** Check this for compatibility with certain IdPs. (Azure needs this checked)
* **Do not validate discovery endpoints:** Check this for compatibility with certain IdPs. (Azure needs this checked)
* **Do not validate issuer name:** Check this for compatibility with certain IdPs. (Azure needs this checked)
* **Username - Claim mapping key:** The name of the claim from where to extract the flow user name. IdP specific. Example: email, upn, unique\_name.
* **Exclude domain:** Check this if the flow user in synchronized or entered without domain.
# Applications
Application tab gathers all features that is needed to create and develop workflows. Users with *type* *AdministerWorkflows* or *AdministerBasicData* can access this tab.
# Menu
One or more menus needs to be configurated to make workflows available in the clients. A menu can have three different types of content *Category*, *Workflow Item* and *Inbox*.
* **Category:** A catecory will categorize workflows and menus in the clients.
* **Workflow Item:** Choose what workflows that should be available in the menu.
* **Inbox:** Add and configure an inbox to make seeded and hand overed workflows available for the user. Read more about how to configure an [inbox here](/6.11/development/flow-studio/applications/menu/inbox).
*Edit Roles* to assign the menu to those roles that the menu should be availalbe to.

**Related pages:**
{% content-ref url="/pages/-LucD3DwRGeVTtmBHldF" %}
[Roles](/6.11/development/flow-studio/environment/roles)
{% endcontent-ref %}
# Inbox
There are two types of inboxes, seed item and handover item.
## Seed Item
**How to configure a seed item in a workflow:**
Connect a table or machine step with a data arrow to the start step.

Click on the start step and configure:
* **Seed table:** Choose a table
* **Table key:** Choose a column (from the data source)
**How to configure seed item in an inbox:**
Click on "+" and choose *Seed Item* and then select your workflow in the server content.


**How to configure inboxes:**
* **Title:** The title is displayed on the inbox item.
* **Description:** The description is displayed under the title text on the inbox.
* **Item Title:** The title is displayed on the inbox item after clicking on the inbox.
* **Description:** The description is displayed under the title text after clicking on the inbox.
* **Filter:** Displays items after entered filter.
* **Calendar:** Displays items on a specific date in the calendar tab in the inbox.
* **Favorite:** Displays items under the favorite tab in the inbox.
* **Priority:** Displays items under the priority tab in the inbox.

## Handover Item
**How to configure handover item in an inbox:**
Click on + and choose *Handover Item* and then select your workflow in the server content.

# Workflow
The Workflow area is where workflows can be created, published and maintained for the Novacura Flow platform.
A workflow is a visual representation of a sequence of steps, some of which are to be performed by an **user**, typically on a mobile device. The workflow consists of [**user steps**](/6.11/development/flow-studio/applications/workflow/user-step), which require the user to do something; [**machine steps**](/6.11/development/flow-studio/applications/workflow/machine-step), which connects to underlying systems and databases thru connectors; various **flow control steps**, which for example tell the workflow how to proceed from the current step to the next.
The sequence of steps is determined by flow **sequence arrows** that bind them together.
Below image shows a workflow with a **start step**, two **user steps** and a **machine step**. Above the first user task is a **machine step** that only retrieves data and it is connected to the **user task** with a **sequence data arrow**. To the right of the **sequence data arrow** is a **text annotation**.

## Get started
Under the *File menu* is it possible to create new, open, close and save workflows in the same way as in most other Windows application. When creating a new workflow, you will be a prompted to enter the title, type and schema for the workflow. It is also possible to choose theme color and compose an icon.
### Type
There are three different workflow types:
* **User workflow** - workflow executed by a user
The user workflows are the ones that can contain user steps and become user applications. Available schemas: Empty and Operation and Data
* **Machine workflow** - workflow executed as a service
Machine workflows does not contain any user steps but are executed on demand to fetch data or perform an action. Available schemas: Empty, Datasource with Pagination and Filtering, Datasource and Operation and Data
* **Workflow fragment** - part that can be included in user workflow.
Fragment is a type of workflow which is run within a workflow. The same fragment can be used in multiple workflow so it beneficial to create fragments for actions that are commonly done, for example fetching user data or saving pictures. Available schemas: None
### Schema
* **Empty**
* **Data source with pagination and filtering**
* this a workflow where features like Pagination, Sorting and Filtering are being used on the data fetched from database or API connectors, it can also be applied when using table operations connector.
* **Datasource**
* this is a workflow which should return entire data set. For example all data from SQL table. Portal will automatically apply all parameters like pagination and filtering. This data source can additionally take Input parameter so data additionally can be filtered out (when a portlet is configured to listen to another portlet). When using Input parameter data is cached individually per user. If not, cached data is shared between multiple Portal users.
* **Operation and data**
* For the map portlet
he title and description are shown in the main menu of the Flow Clients and can be changed under the [Metadata panel](/6.11/development/flow-studio/applications/metadata-panel) in the Flow studio. If the workflow should be available in more than one language, add other languages under [Languages](/6.11/development/flow-studio/environment/languages) found in the environment part of the Flow studio.
## **Managing workflow elements:**
* Create a new workflow element by dragging and dropping an element from the toolbox to the workflow canvas, or right-click on the workflow canvas and select the element type you wish to create from the contextual menu.
* To insert a new workflow element between two existing, connected elements, right-click on the sequence arrows and choose the element from the Insert menu.
* To insert an existing workflow element between two connected elements, drag the element to insert onto the sequence arrow and drop it when the arrow turns green.
* To delete a workflow element, right-click on it and select Delete from the contextual menu or mark the workflow element and press the delete button.
* To edit the configuration for an element double-click the element or right-click the element and select "Edit Configuration..." from the contextual menu.
* If there is an error in the element configuration a error message will appear in the [Problems panel](/6.11/development/flow-studio/applications/problems).
## **Managing sequence arrows:**
* To add a sequence arrow from one element to another, right-click the source element and select Add Sequence arrow from the contextual menu.
* To remove a sequence arrow, right-click on it and select Remove arrow from the contextual menu.
* To change the target element of an existing sequence arrow, click on the target point, move the mouse to the new target element and click on it.
* To change the source element of an existing sequence arrow, click on the source point, move the mouse to the new source element and click on it.
* To add a joint point to a sequence arrow, right-click on the sequence arrow and select Add point from the contextual menu, or hold down the shift key and click on the sequence arrow.
* To remove a joint point from a sequence arrow right-click on the joint point and select Remove point from the contextual menu, or hold down the shift key and click on the joint point
* While creating or editing a sequence arrow, use the escape key on the keyboard to cancel the current operation.
* While adding or modifying a sequence arrow, use the backspace key on the keyboard to remove the joint point closest to the mouse cursor.
* While creating a new sequence arrow, create a new target element directly by right-clicking on the empty canvas background and selecting a element to create from the contextual menu.
## **Configuring sequence arrows:**
To control the behaviour of a Sequence Arrow, double click on the arrow text. The following window should then appear.
For the Sequence Arrow configuration, you can do the following:
* *Text:* Change the name of the user step exit. This name is what the User will see as text on the exit button in the current User Step. The name of the exit can be set for each of the used language. What text the User will see depends on which language the User is using.
* *Available if:* Use this configuration if you want to control when an exit should be available for the User. When the given expression evaluates to True, the exit will be available. Flow Script including any variable from the workflow which can be used in the User Step, can be used to create an expression. Variables defined in the current User Step cannot be used for the Available if expression. If no expression is given, the exit will always be available.
* *Priority:* Use Priority to control in which order the exit button in the User Step appears.
* *Default:* This option can be used if the User Step has many exits and one of the exits should be set as the default exit. The Default option is especially useful when scanning is used to execute the workflow. If this option is checked, the current exit will automatically be selected when the User moves from the last input control on the User Step. This works the same regardless if you move forward using scanning or press Enter on your keyboard to move forward.
## Data in the workflow
Workflows are all about collecting and consuming data. Pieces of information supplied by the user or fetched from a system or database are stored in named variables in the workflow.
For example, a user step may prompt the user to scan a part number. We may choose to store this information in a variable called, for instance, partNo. The partNo variable would then be available to all steps from this user step where the variable is created (that is, steps that can be deterministically reached by following the arrows from the user step).
The Flow studio automatically checks the workflow to ensure that variables are used correctly; making sure that a variable cannot be consumed before creating it. However, unlike in some programming languages, variables don't need to be explicitly declared beforehand - assigning to a variable (in a user step or machine step) automatically brings it into existence.\
When using variables in the user steps (for example in texts and lists) use {} to get a lists of all available variables or write the name of the variable in {} like the picture below. In the machine steps is the syntax of how to get the variables different dependent on what connector that is used, read more about what syntax to use under [machine step](/6.11/development/flow-studio/applications/workflow/machine-step).

## Navigation
To move the view focus to the start item, press the home button on your keyboard.
**Scrolling through the workflow:**
* The [Navigation panel](/6.11/development/flow-studio/applications/navigation), drag the red square to show differnt parts of the workflow
* Hold down the ctrl key on your keyboard and drag the mouse on the workflow canvas
* The arrow keys on your keyboard
**Zooming the workflow in or out:**
* The scroll wheel on your mouse
* The View menu
* Ctrl and + or ctrl and -
#### Image/PDF export
* To export the workflow as a PDF file, select "Export as PDF..." from the *File menu*
* To export the workflow as a more print friendly PDF file, select "Export as PDF(print)..." from the *File menu*
* To export the workflow as an image file, select "Export as Picture..." from the *File menu*
# Start step
### 
The start step is created automatically and cannot be deleted. It represents the first step of the workflow and can be configured with start parameters. Double-click on the start step to edit the start parameters.
**Seed table**
**Swimlane start position**
# User step
### 
A user step contains a sequence of interaction items, like input controls, lists and static texts. Each interaction item type has a number of properties and preferences. Extend *User step* in the tree beside to read about all the different user controls.
## Multi exits
A user step can have multiple exits that will appear like buttons in the clients. There is no restriction on how many exits that it is possible to have, but too many buttons in the client (especially in the mobile clients) can look messy, therefore it can sometimes be better to use a sub workflow instead of a button.
If a user step got one exit step it's automatically set to default but when having more than one exit you have to manually set one exit to default, otherwise no exit will be selected automatically when using enter or scanning in a workflow.
Click to open the exit step and choose *default*.
The first exit button is set to default in the Web Client and the priority of the buttons is set to show in which order they should be displayed.

### Always enabled exit
Tick the box Always Enabled if an exit should be available even if mandatory data in the user step is missing.
If data is partly entered in the user step from which an always enabled exit is used, the data is not cleared but can be used later in the workflow. The workflow designer should take care when using always enabled exit so the next step is not dependent of data from the exited step.
## Pinned user steps
A pinned user step are an information
It is only possible to use [Header](https://home.novacuraflow.com/Help/6.10/?help_root_applications_workflow_user_items_header), [Static Text](https://home.novacuraflow.com/Help/6.10/?help_root_applications_workflow_user_items_static_text), [Labeled Static Text](https://home.novacuraflow.com/Help/6.10/?help_root_applications_workflow_user_items_labeled_static_text), [Link](https://home.novacuraflow.com/Help/6.10/?help_root_applications_workflow_user_items_link) and [List Presentation](https://home.novacuraflow.com/Help/6.10/?help_root_applications_workflow_user_items_list_presentation) in pinned user steps, this because a pinned user step is only a way to show the user information.

The pinned user step will show up in the side of the screen, and the user need to tap/click on the icon to extend or collapse the pinned user step. In the below picture is the pinned user step to the left and the regular user step to the right. If there is more then one pinned user step in the workflow, will the pinned user step be replaced when the user steps over another pinned user step.

## History
From the user step it's possible to edit the text that is displayed in the historical view in the clients.
Click on *historical* to configure the historical view. Then enable *show in history* to be able to see the text in the clients. Enter the preferred text into the text, title and value field.

In Universal windows client the configured history step looks like this:

## User step designer
The designer allows for drag-and-drop interaction with the user step. The user can simply drag one item on the left bar and drop it inside the design area. The designer allows for 1, 2, 3 and 4 columns to be added in one row. The web client will expand or shrink depending on the amount of columns added in the designer step.

# Header
A text header is used to display a bold, non-editable, single-line text block to the user. Use your variables (with {}) and Flow script to make your texts generic.
Text headers only have one property:
* **Text**\
The text to be displayed in the header.

# Static text
A static text is used to display a non-editable multi-line text block to the user. Use your variables (with {}) and Flow script to make your texts generic.
* **Text**\
Enter a text that will be displayed to the user. Use the pipe sign (|) to insert line breaks in the text.

# Labeled static text
The labeled static text control can be used to structure data in a good way on the screen.\
For example: Label = "Order no:" and text = "{orderNo}" (a variable for the order number). The result will look like this:
Use your variables (with {}) and Flow script to make your texts generic.
* **Label**\
Enter a text that will be displayed to the user.
* **Text**\
Enter a text that will be displayed to the user.
* **Use Large Font**\
Check the box to make the font size of the text larger.

# Link
* **Large Text**\
Enter a text to describe the uri, this text will be shown in large text.
* **Small Text**\
Enter a text to describe the uri, this text will be shown in small text.
* **URI**\
Enter a URI. An URI can for example be a name, location or URL.
* **Link Type**
* **Document:**
* **Web:** the uri link will be open as a web site in the users default web browser.
* **Email:** the uri will be open as an email message window where the uri will be placed in the to field.
* **Phone:** the phone number will be called if the uri is opend on a mobile device.
* **Address:** if the uri is opened in a mobile device with a GPS app, the GPS will be opend and show the address.

# External app launcher
The external app launcher can be used to launch an external app, for example Flow Print or Google Maps, directly from a workflow.
* **Title**\
The title will be the prompt on the user step object.
* **Icon**\
Select the icon that are to show on the object.
* **Target Variable**\
The name of the object output variable.
* **Pre Large Text**\
The large text shown on the object before being executed.
* **Pre Small Text**\
The small text shown on the object before being executed.
* **Post Large Text**\
The large text shown on the object after being executed.
* **Post Small Text**\
The small text shown on the object after being executed.
* **Auto Run**\
If ticked, the external app launcher will be automatically started when the user gets to a step where it is included.
* **Allow Empty**\
Tick this box if the user should be allowed to continue in the workflow without running the external app launcher.
* **Allow Multiple Runs**\
Tick this box if the external app launcher should be possible to run multiple times.
* **Android/iOS/Universal Windows URI**\
Enter the URI for the app which is to open here in these fields.
* **External App Callback Keys**\
Variables into which callbacks from the app are to be stored.
* **External App Input Variables**\
Variables which are to be sent to the external app. If Flow Print is the app that is to open, this is where the ZPL code variable is put.

# Image viewer
The *Image Viewer* is used to display images in the *User step*.
In order to display an image the following has to configured
**URL** - The source url from which the image will be fetched.
> All clients must have direct access to the image source

# Text input
A text input interaction item is used when the user is required to supply **textual information containing letters and/or digits**, either manually (using a keyboard) or with the aid of a barcode scanner.
Text inputs have the following properties:
* **Target Variable**\
The name of the new variable in which to store the text entered.
* **Prompt**\
The label to display over the text input field. For readability, it's often better to use a **Text Header** interaction item in user tasks with a single text input.
* **Default Text**\
The text that will be entered as default when the user first enters the user task.
* **Allow Empty Input**\
If set to **True**, the user is allowed to move forward in the workflow without entering anything into the text field.
* **Multiline**\
If set to True, the text box will expand into a multi-line text editor allowing line breaks.
* **Force Uppercase**\
If set to **True**, the contents of the text input will automatically be translated into UPPERCASE before being stored in the target variable.
* **Enable Text Correction**\
If set to **True**, the text input will be enabled for spell checking, word suggestions and auto correction, on host systems that support such features. Use this only for human language text fields (e.g. work order error descriptions).
* **Trim Input Automatically**\
If set to **True**, the contents of the text input will be trimmed (leading and trailing whitespace removed) before being stored in the target variable.
* **Use Password Mask**\
If set to **True**, the text entered will show up as bullets like in a password input field.

# Numeric input
A numeric input interaction item is used when the operator is required to supply numeric information, either manually (using a keyboard) or with the aid of a barcode scanner. Numeric inputs treat both points (.) and commas (,) as decimal separators.
Numeric inputs have the following properties:
* **Target Variable**\
The name of the new variable in which to store the number entered.
* **Prompt**\
The label to display over the numeric input field.
* **Default Value**\
The number that will be entered as default when the operator first enters the user task.
* **Allow Empty Input**\
If set to **True**, the operator is allowed to move forward in the workflow without entering anything into the numeric field.
# Date input
A date input interaction item is used when the operator is required to pick a calendar date.
Date inputs have the following properties:
* **Target Variable**\
The name of the new variable in which to store the date entered. Dates are stored in the YYYY-MM-DD format.
* **Prompt**\
The label to display over the date input field.
* **Default Value**\
The default value must be in YYYY-MM-DD format. If no default value is supplied, today's date will be displayed by default.
* **Allow Empty Input**\
If set to **True**, the operator is allowed to move forward in the workflow without entering anything into the date field.
# Time input
A time input interaction item is used when the operator is required to enter a time input.
Time inputs have the following properties:
* **Target Variable**\
The name of the new variable in which to store the time entered. Time are stored in the HH-MM format.
* **Prompt**\
The label to display over the time input field.
* **Default Value**\
The default value must be in HH-MM format. If no default value is supplied, the present time will automatically be displayed by default.
* **Allow Empty Input**\
If set to **True**, the operator is allowed to move forward in the workflow without entering anything into the time field.
# Check box input
A boolean input interaction item is used when the operator needs to answer a true/false question of lesser importance. Boolean inputs show up as check boxes in the Flow Client.
Boolean inputs have the following properties:
* **Target Variable**\
The name of the new variable in which to store the choice entered. A positive choice (checked) creates a variable value of true, while a negative choice (unchecked) creates a variable value of false.
* **Prompt**\
The label to display over the check box input field.
* **Default Value**\
Either false (unchecked), true (checked) or a variable reference to a value of either false or true.
# Binary option input
A binary option interaction item is used when the operator needs to choose between two values. For example; they are used in conjunction with a decision step to allow the operator to pick a path through the workflow.
Binary option input have the following properties:
* **Target Variable**\
The name of the new variable in which to store the chosen value of either option 1 or 2.
* **Option 1 text**\
The text to be displayed for option 1.
* **Option 2 text**\
The text to be displayed for option 2.
* **Default value**\
Enter a default value (value of option 1 or 2) as a default value.
* **Option 1 value**\
The value that should be put into the target variable for the option 1.
* **Option 2 value**\
The value that should be put into the target variable for the option 2.
* **Refuse option 1**\
The operator is only allowed to move forward through the workflow if he/she chooses the second option.
# List selection input
A list selection input is used to select a record or value from a data source.
List selection inputs have the following properties:
* **Target Variable**\
The name of the new variable(s) in which to store the record selected.
* **Table Variable**\
Choose the table that will be the data source in the list.
* **Default Selection** Use Flow script to do a default selection of values.\
**Example:**
```
{customerNo = 5}
```
* **Result Transformation** Use this if the output record variable differs from the selected target variable.\
**Example:**
```
{[column1: orderNo, column2: orderDate]}
```
* **Prompt**\
The label displayed at the top of the list.
* **Large Text**\
Enter text and variables that should be displayed in the list (can be left empty but observe that either large or small text needs to be configured to show something in the list). Use {} to get a list of available variables from the source table.
* **Small Text**\
Enter text and variables that should be displayed in the list (can be left empty but observe that either large or small text needs to be configured to show something in the list). Use {} to get a list of available variables from the source table.
* **Item Style**\
Use a case statement to decide what color the columns should have.\
**Example:**
```
{case when objStatus = 'Planned' then 'PURPLE'
when objStatus = 'Released' then 'GREEN'
when objStatus = 'Rested' then 'RED'
else '' end}
```
**Colors:** GREEN, RED, YELLOW, BLUE and PURPLE\
*Log on to the Flow community to download an example workflow of item style:*
* **Group Rows By**\
If the list should be grouped choose a column from the source table to group the list by. Set to "none" to not group the list.
* **Show Automatically**\
If set to **True** the list will be open direct when the user steps into the user step (only in mobile clients) so the user does not need to open the list and after that choose from the list, and in that way make the workflow more user friendly.
{% hint style="warning" %}
The new generation mobile clients do not use the Show Automatically setting. For more information see list selection help in Flow Help for 6.13.
{% endhint %}
* **Match By**
* *Rows:* If a barcode scanner is used in a list selection input, the Flow Client will search the data source for a record where the Key field matches the scanned value and select the corresponding line in the list. If no match is found, the Flow Client will attempt to match the other fields on the data source to the scanned value and select the first line where a match is found.
* *Specific Columns:* Enables Match Columns.
* **Match Columns**\
Click Edit to open the Match Columns pop up. In Match Columns it is defined which columns should be matched when scanning and in which order (top to bottom). When Specific Columns have been selected the scanning is on exact match only, regardless of client settings. Letters in upper or lower case are seen as separate values.

> If the list look is empty, make sure that varibales are entered in the large and/or small text fields.
# List multi-selection input
A list multi-selection input is used when it should be possible to choose more than one record in a list. It can also be left with no chosen value.
If a barcode scanner is used in a list multi-selection input, the Flow Client will search the data source for a record where the Key field matches the scanned value and select the corresponding line in the list. If no match is found, the Flow Client will attempt to match the other fields on the data source to the scanned value and select the first line where a match is found.
List selection inputs have the following properties:
* **Target Variable**\
The name of the new variable(s) in which to store the selected records. (The output variable type will be a table.)
* **Table Variable**\
Choose the table that will be the data source in the list.
* **Default Selection** Use Flow script to do a default selection of values.\
**Example:**
```
{objectStatus = 3}
```
* **Prompt**\
The label displayed at the top of the list.
* **Large Text**\
Enter text and variables that should be displayed in the list (can be left empty but observe that either large or small text needs to be configured to show something in the list). Use {} to get a list of available variables from the source table.
* **Small Text**\
Enter text and variables that should be displayed in the list (can be left empty but observe that either large or small text needs to be configured to show something in the list). Use {} to get a list of available variables from the source table.
* **Group Rows By**\
If the list should be grouped choose a column from the source table to group the list by. Set to "none" to not group the list.
* **Show Automatically**\
If set to **True** the list will be open direct when the user steps into the user step (only in mobile clients) so the user does not need to open the list and after that choose from the list, and in that way make the workflow more user friendly.
{% hint style="warning" %}
The new generation mobile clients do not use the Show Automatically setting. For more information see list selection help in Flow Help for 6.13.
{% endhint %}
* **Item Style**\
Use a case statement to decide what color the columns should have.\
**Example:**
```
{case when objStatus = 'Planned' then 'PURPLE'
when objStatus = 'Released' then 'GREEN'
when objStatus = 'Rested' then 'RED'
else '' end}
```
**Colors:** GREEN, RED, YELLOW, BLUE and PURPLE\
*Log on to the Flow community to download an example workflow of item style:*

> If the list looks like it is empty, make sure that varibales from the list is entered in the large and/or small text field.
# Menu selection input
A menu selection input is used to select a key field value from a machine task or a table. Menu selection inputs take up less space than list selection inputs, but are less practical for large data sources with lots of information in each record.
Menu selection inputs have the following properties:
* **Target Variable**\
The name of the new variable(s) in which to store the selected value. The data that will be stored in the varibale is the value frpm the seleced variable in "Field to select".
* **Table Variable**\
Choose the table that will be the data source in the list.
* **Prompt**\
The label displayed at the top of the list.
* **Row Text**\
Enter text and variables that should be displayd in the list. Use {} to get a list of available variables from the source table.
* **Default Value**\
Enter a default value based on the values of the variable entered in *Field to Select*.
* **Field to Select**\
The target variable will contain the value of this field.
* **Show Empty Option**\
The list will be empty when the user enter the user step.
* **Text of Empty Option**\
Enter a text for the empty option (optional).
* **Allow Empty Option Selection**\
If set to **True**, the operator is allowed to move forward in the workflow without entering anything into the text field.
# Image selection input
The *Image Selection Input* is used to show a list of images that are selectable, it supports both single- and multiple selections.
Images that are selected are imported from image URLs > e.g ";

#### Configuration
One can import a table with an URL-column of several images to list several images, item description and etc.
* **Output**
* **Target Variable** - Output table of images selected and their properties(Text).
* **Data Source**
* **Table Variable** - Input table of image-URLs and their properties.
* **Default Selection** - adding a source from input table such as {Column2} will preselect all images contained in that column.
* **Appearance**
* **Prompt** - A text prompt.
* **Item Text** - Text for the images, can import text from a column from the source table.
* **Image Source** - Where the image is imported from, can be a standard URL text, or a column in a table with URLs.
* **Allow Multiple Selections** - TRUE/FALSE checkbox if the userstep supports multiple image selections.

# Data grid
A table that is possible to edit direct in the ongoing workflow.
* **Prompt**\
The label displayed above the data grid.
* **Source**\
Choose a source or leave it empty.
* **Columns**\
Click on edit to add or modify columns in the grid. Read more about configuration of columns below.
* **Allow Add**\
Check this box if it should be possible to add new rows to the data grid.
* **Allow Delete**\
Check this box if it should be possible to delete rows from the data grid.
* **Use Change Tracking**\
A variable RowState will appear when this checkbox is checked, this variable can have four different states:
* **Unchanged** - when the row in the data grid is unchanged
* **Changed** - when the user have change something on the row in the data grid
* **Added** - When the user have added a new row (when the row is new)
* **Removed** - When the user have removed the row
Use the variable RowState to handle new, modify and delete in scripts.
**Example:**
```
If @RowState = 'Changed'
Begin
Update OrderLines
Set Qty = @Qty
Where OrderNo = @OrderNo and OrderRowId = @OrderRowId
End;
```
```
If @RowState = 'Removed'
Begin
Delete from OrderLines
Where OrderNo = @OrderNo and OrderRowId = @OrderRowId
End;
```
* **Row Selection Mode**\
Enables the possibility to select one or multiple rows:
* **No selection** - not possible to select any row
* **Single selection** - only possible to select one row
* **Multi selection** - one or more rows can be selected
The grid is by default set to No selection. Calendar grid and grid in CE client are out of scope.
Selected rows are fetched in a Scrip Step (or Assignment Step) after the grid User Step using the variable *IsSelected*. The target variable from the script step is then used in as the source when the selected data is to be used.

* **Target Variable**\
The name of the new variable in which the data is stored as a table.

* **Item Style**\
Use a case statement to set row color based on a condition. Also see Cell Color under All Columns. CE client is out of scope.
**Example:**
```
{case when objStatus = 'Planned' then 'PURPLE'
when objStatus = 'Released' then 'GREEN'
when objStatus = 'Rested' then 'RED'
else '' end}
```
**Colors:** GREEN, RED, YELLOW, BLUE and PURPLE
#### Columns
Click EDIT to configure the columns in the grid. The Add All Columns button will add all columns in the Source in one click, Remove All Columns will remove them all. Use + or - respectively to add or remove a single column. In a calendar grid a mandatory date column is always added by default, this column is not affected by the Add/Remove All functionality and is not possible to remove.
**Edit columns settings:**
* **All Columns**\
The following settings are available for all column types:
* **Title:** Enter a title for the column.
* **Size Mode:** Size mode can be set to Break, Clip or Fit (for CE client Clip and Fit are available):
* *Break* - Break works like word wrap, ie the column width is defined by the Size setting and the text then continues on multiple rows to the maximum height of 85% of max grid height. Uses ellipsis function to indicate omission of text.
* *Clip* - Clip mean that the text is clipped according to size setting. No wordwrap. Uses ellipsis function to indicate omission of text.
* *Fit* - Fit means that the column width is fitted to the largest value displayed in the column - up to approx. 85% of grid width. Fit overrides the Size setting. Uses ellipsis function to indicate omission of text.
* **Size:** Decide what width of the column. Sizes: Small, medium, large.
* **Cell Color:** Use a case statement to set cell color based on a condition, also see Item Style above. Available colors are: GREEN, RED, YELLOW, BLUE and PURPLE. CE client is out of scope.
* **Text Column**\
Enter a title of the column and a variable name, for example First name as the title and firstName as the variable name. Choose a value type, which represents that type of data that the column should hold. Decide the appearance of the column if the data should be editable, hidden and/or mandatory.
* **Hidden:** Check this if the column should be hidden and not showed to the user.
* **Editable:** Check this if the column should be editable for the user.
* **Default Value:** Enter a default value.
* **Editable For New Rows:** Check this if the column only should be editable when adding new rows.
* **Numeric Column**\
Enter a title of the column and a variable name, for example First name as the title and firstName as the variable name. Choose a value type, which represents that type of data that the column should hold. Decide the appearance of the column if the data should be editable, hidden and/or mandatory.
* **Format String:** Numeric format strings are used to format common numeric types. Using the *C* modifier in the format string area converts the numeric input into local currency. Also the hashtag symbol (#) represents one number in the total numeric value, so one can format the 6-digit value *123456* with inputs in the following way: `First two numbers: ## Second two numbers ## Last three Numbers ##`\
`Result: First two numbers 12 Second two numbers 34 Last three numbers 56`\
Read more about formatting [here](https://docs.microsoft.com/en-us/dotnet/standard/base-types/standard-numeric-format-strings)
* **Hidden:** Check this if the column should be hidden and not showed to the user.
* **Editable:** Check this if the column should be editable for the user.
* **Default Value:** Enter a default value.
* **Editable For New Rows:** Check this if the column only should be editable when adding new rows.
* **Value List Column**\
Enter a title of the column and a variable name, as in below example Food as the title and food as the variable name, check *Include in Output* to include the variable in the target variable of the grid.
* **Table Expression:** Connect a table to the value list, the result of the below example will be based on what the user have selected in the catalog value list.
* **Row Text:** Enter the variable that represents the value that should be showed in the value list.
* **Key Expression:** Enter a variable here (for example an id) and use *Output Key Only* to just get the one variable instead of a record.
* **Output Key Only:** Check this to get a variable with the *Key Expression*.
* **Editable For New Rows:** Check this if the column only should be editable when adding new rows.

* **Computed Column**\
Enter a title of the column and a variable name, for example sum as the title and sumValue as the variable name. The computed column can for example be used as a summary column. If the grid have one column with a price and one with a discount, then the columns can be summarized in the computed column. Do the calculation ({price - discount}) of the variables price and discount in the template field and choose what value type the column should have.
* **Value Template:**
* **Hidden:** Check this if the column should be hidden and not showed to the user.
* **Checkbox Column**\
Enter a title of the column and a variable name, for example Invoice as the title and invoice as the variable name. Decide if the checkbox should be check by default or not.
* **Editable:** Check this if the column should be editable for the user.
* **Default Value:** Enter a default value.
* **Editable For New Rows:** Check this if the column only should be editable when adding new rows.
# Calendar
A calendar with entries that can be viewed, added, edited and removed. Same table setup as in [Data grid](https://home.novacuraflow.com/Help/latest/?help_root_applications_workflow_user_items_data_grid).

#### Blurbs
Use blurbs to present day specific data.\
Enter a title of the blurb and either use text, variables or FlowScript to visulize data in the value field.\
Use FlowScript to for example summarize data from the grid part of the calendar control, and when the user enter the numbers in the grid the summarized value in the blurb will be live updated.
*Examle:*
**Title:** Reported\
**Value:** {sum((dayEntries where internalQuantity > 0).internalQuantity)}
#### Configuration
* **Calendar start:** Start date of the calendar.\
Enter a date, example: 2018-05-05 or {now()-10}
* **Calendar end:** End date of the calendar.\
Enter a date, example 2020-05-05 or {now()+10}
* **Unavailable days:** An unavailable day will be grey and not clickable.\
Enter a date, example {selectedDay = "2018-05-05"} Enter multiple dates from a table, example {selectedDay in blocked.days}
* **Selected date:** This date will be selected by default when entering the step with the calendar view.\
Enter a date, example 2018-05-05 or {now()-1}
* *Read-only days:* A read-only day will be red when it is selected and it will not be possible to add, delete or edit the data grid for those days.\
Enter a date, example 2018-05-05 or {now()-1} Enter multiple dates from a table, example {(selectedDay where status = 'Confirmed').days}
#### Style
Use a case statement to decide what color the columns should have based on a variables value.
* **Example:**\
{case when SelectedDay in table.column then "RED" else "" end}
* **Or to mark a date that has got an entry write:**\
{case when any(dayEntries) then "RED" else "" end}
* **Edit columns:**\
First column in "edit columns" is grayed out. It's possible to choose source, edit title and include and enter output variable.
# List presentation
A list presentation item is used to display a list without requiring the user to select any record. Therefore it is no Target Variable property.
* **Table Variable**\
Chose a data source with the data to display in the list.
* **Prompt**\
The label displayed at the top of the list.
* **Large Text**\
Enter text and variables that should be displayd in the list (can be left empty but observe that either large or smal text need to be configured to show something in the list). Use {} to get a list of available variables from the source table.
* **Small Text**\
Enter text and variables that should be displayd in the list (can be left empty but observe that either large or smal text need to be configured to show something in the list). Use {} to get a list of available variables from the source table.
* **Row Hyperlink Template**\
Enter a variable here to get hyperlinks in the list.
* **Item Style**\
Use a case statement to decide what color the columns should have based on a variables value.\
**Example:**
```
{case when objStatus = 'Planned' then 'PURPLE'
when objStatus = 'Released' then 'GREEN'
when objStatus = 'Rested' then 'RED'
else '' end}
```
**Colors:** GREEN, RED, YELLOW, BLUE and PURPLE\
*Log on to the Flow community to download an example workflow of item style:*
* **Group Rows By**\
If the list should be grouped choose a column from the source table to group the list by. Set to "none" to not group the list.
# Camera input
If the device has a camera the user will be able to take a picture with the camera input. If the camera input runs in a device without a camera the user will be able to choose a picture-file on the device.
* **Target Variable**\
The name of the new variable in which the data stores.
* **Prompt**\
The label displayed above the camera input.

# File gallery
With the file gallery is it possible to show files that the user can open and use on their device. The user can also add files to the gallery.
* **Target Variable**\
The name of the new table variable in which the data stores.
* **Prompt**\
The label displayed above the file gallery.
* **Source**\
Choose a source table that contains files.
* **Uploads**\
Choose upload type, singel or multiple upload.
* **Single:** if the user only should upload one file.
* **Multiple:** if the user should be able to upload more then one file (or zero files).
* **Allow File Endings**\
Enter file endings for those type of files that should be allowed to add to the file gallery. For example; .doc, .xls
* **Target Image Size**\
Use target image size to scale images or make it possible for the user to decide what size the image should be scaled to.
* **Original:** All attached images will not be scaled.
* **Small (25%):** All attached images will be scaled to the size of 25% of the original size.
* **Medium (50%):** All attached images will be scaled to the size of 50% of the original size.
* **Large (75%):** All attached images will be scaled to the size of 75% of the original size.
* **User defined:** The user will be able to decide if the image should be scaled and what size it should be scaled to.

# GPS location input
The GPS location input catches the device/users location coordinates.
* **Target Variable**\
The name of the new variable in which the GPS coordinates stores.
* **Text**\
The label displayed above the GPS input.
* **Failure text**\
Enter a text that will be shown to the user if it is not possible to catch the coordinates.
* **Allow failure**\
Check the box if failures should be allowed.
# Signature capture input
The signature capture input allows the user to write their signature directly on the device.
* **Target Variable**\
The name of the variable that store stores the signature in PNG-format.
* **Prompt**\
The label to display over the signature area.

# Item creation sub task
A sub workflow is an element in a User step
 \
**There are three types of sub workflows:**\
**Check List:** Executes one workflow for each record in a list of things to do.\
**Item Creation:** Creates a new item for each time the sub workflow is executed.\
**Verb:** A side track in the workflow where the sub workflow can be executed one or many times.
### Item Creation Sub Task
A sub workflow is created from a *User Step*. Create a new *User Step* and add a sub workflow element. Configure the appearance of sub workflow in the client.
**Set the following:**
* **Target Variable:** Enter a name for the output varibale. The output from the sub workflow will end up in this new table variable.
* **Title:** Text on the sub workflow button.
* **Icon:** Icon one the on the sub workflow button.
* **Sub Task Text:** Text on the Item (e.g. the Time Report) that has been created. Varibles can be added later.
* **New text:** Text on the New button, to add new item (e.g. a new Time Report)
* **Pills:** The indicator on the sub workflow button
* **Post-Blurbs:** Info parts on a created Item.
Close the *User Step*, an icon will now appear that representing the added sub workflow. Double click on the sub workflow icon to open the (empty) sub workflow. Create a workflow, all variables from the main workflow are available in the sub workflow. Return data back to the main workflow, by configuring the *End step* in the sub workflow.

# Check list sub task
A sub workflow is an element in a User step
 \
**There are three types of sub workflows:**\
**Check List:** Executes one workflow for each record in a list of things to do.\
**Item Creation:** Creates a new item for each time the sub workflow is executed.\
**Verb:** A side track in the workflow where the sub workflow can be executed one or many times.
### Check List Sub Task
A sub workflow is created from a *User Step*. Create a new *User Step* and add a sub workflow element. Configure the appearance of sub workflow in the client.
Set the following:
* **Title:** Title of the check list.
* **Icon:** The icon that will be showed in the check list.
* **Target Variable:** Enter a name for the output variable. The output from the sub workflow will end up in this new table variable.
* **Source:** Choose a table from the list of available table variables. Each row in the result from the table variable will be a row in the check list.
* **Row Variable:** Enter a varibale name, this vaiable will hold the source data of the choosen check list row and make the data available in the sub workflow.
* **Sub Task Text:** Text on the check list row.
* **Pills:** The indicator on the sub workflow button.
* **Pre-Blurbs:** Information to the user, before taping/clicking on the check list row.
* **Post-Blurbs:** Information to the user, after taping/clicking on the check list row.

Close the *User Step*, an icon will now appear that representing the added sub workflow. Double click on the sub workflow icon to open the (empty) sub workflow. Create a workflow, all variables from the main workflow are available in the sub workflow. Return data back to the main workflow, by configuring the *End step* in the sub workflow. 

# Verb sub task
A sub workflow is an element in a User step
 \
**There are three types of sub workflows:**\
**Check List:** Executes one workflow for each record in a list of things to do.\
**Item Creation:** Creates a new item for each time the sub workflow is executed.\
**Verb:** A side track in the workflow where the sub workflow can be executed one or many times.
### Verb Sub Task
A sub workflow is created from a *User Step*. Create a new *User Step* and add a verb sub-task element. Configure the appearance of verb sub-task element in the client.
Set the following:
* **Title:** Text on the verb sub-task element button.
* **Icon:** Icon one the on the verb sub-task element button.
* **Allow Multiple Runs:** This should be check to allow the verb sub-task element to be run multiple times whist in the same user step in the main workflow.
* **Pills:** Pill on the sub workflow button. One or multiple pills can be configured on the verb subtask, the pill can display a text or a count of how many times the verb sub-task has been run\*

Close the *User Step*, an icon will now appear, representing the added sub workflow.
Double click on the sub workflow icon to open the (empty) sub workflow.
Create a workflow, all variables from the main workflow are available in the sub workflow.
Return data back to the main workflow by configuring the *End step* in the sub workflow. The output from the sub workflow is put in the target variable of the verb sub-task element. The sub workflow output is available once the user has moved on from the user step the verb sub-task is located in, i.e. it is not possible to use the data in the user step the sub workflow is started from.
The output from a sub workflow will always be in grid format. 
#### Verb sub-task output example

### Verb sub-task output example

The user step contains three verb sub-tasks with the following content:
1. Add Additional Info a. addInfo ? text input b. finishDate ? date input
2. Add Picture (Allow multiple runs = TRUE) a. addPicture ? camera input
3. Add Material (Allow multiple runs = TRUE) a. gridMaterial ? data grid
4. User Step:

5\. Script Step: outPutPictures

6\. Script Step: selectedMaterialAll

7\. Assignment: selectedMaterial

8\. User Step

Sub verb-tasks run in iOS - Pills:

#### Flow script examples
Scrip Step - Add pictures to table:
```
let table1 = table(data, filename);
for rec_ in value3 do
set table1 = table1 & [data: rec_.addPicture.data, filename: rec_.addPicture.filename];
done
return table1;
```
Scrip Step - Grid ? verb sub task run multiple times (loop in loop):
```
let table1 = table(part_no, part_desc);
for rec_ in value4 do
for rec1_ in rec_.gridMaterial do
set table1 = table1 & [part_no: rec1_.part_no, part_desc: rec1_.part_desc];
done
done
return table1;
```
Assignment ? fetch first picture:
```
Picture = {(*First(value3).addPicture)}
```
Assignment ? fetch last grid:
```
selectedMaterial = {value4.Skip(value4.Count()-1).First().gridMaterial}
```
# Machine step
### 
A machine step is used to read or write data from/to other systems, or to modify the variables in a workflow. Machine steps are invisible to the operator except when something goes wrong (e.g. the ERP system responds with an error message). If a machine step goes wrong, the operator gets an error message and is transported back to the most recent user step.
Machine steps that potentially modify data in another system are called *non-reversible*. Incoming connections to non-reversible machine steps are adorned with an orthogonal line indicating that an operator will not be able to user the back button in the flow client once this step has been successfully executed.

Avoid consecutive non-reversible Machine steps, because each machine step is executed atomically (in its own transaction), any changes to underlying systems are committed as soon as the step is completed. Therefore, in case a transaction has already been committed, the Flow Client cannot go back to the previous user step without risking data inconsistency. If this happens, the operator is forced to exit the workflow right away.
In the example below (see picture), the operator would be forced to exit the workflow if machine step **B** executed successfully but machine step **C** failed.

#### Connectors:
Read more about connectors [here](/6.11/development/flow-studio/connectors).
# Decision step
### 
Decision steps are used to take different routes through the workflow depending on the contents of variables or data sources.
Decision steps are invisible to the operator. To allow the operator to decide which route to take in a workflow, use a *User step* in conjunction with a decision step.
**Outgoing routes**\
To configure the outgoing routes for a *Decision step*, start by connecting the decision step element to two or more items, then double-click on the little cogwheels that appear after the decision step. **Route conditions**\
Each route has to define one or more conditions for when the route should be taken. The order in which these conditions are evaluated is not defined, except that the **default route** is always taken last. (See below.)
Conditions come in two types: Binary and unary. Binary conditions compare one value (L-value or left hand side value) to another value (R-value or right hand side value). A natural language example would be "if A equals B" where A is the L-value and B is the R-value. Unary conditions only have an Lvalue; an example would be "if A exists".
**The following condition types are available for variables:**
* **Equals:** Holds true if the variable is equal to the comparison value.
* **NotEquals:** Holds true if the variable is different from the comparison value.
* **GreaterThan** and **LessThan:** Hold true if the variable is greater or less than the comparison value (only works for numeric values).
* **IsTrue:** Holds true if the variable value is different from 0.
* **IsFalse:** Holds true if the variable value is 0.
* **IsNull:** Holds true if the variable is empty.
* **IsNotNull:** Holds true if the variable is not empty.
**The following condition types are available for data sources:**
* **IsEmpty:** Holds true if the data source is empty (e.g. the underlying SQL query returns no results).
* **IsNotEmpty:** Holds true if the data source is not empty.

# Assertion step
### 
Assertion steps are used to perform "sanity checks" on variables in the workflow. An assertion step consists of one or many conditions (see [Decision steps](https://home.novacuraflow.com/Help/latest/?designer_applications_workflow_decision_step)) and an error message to be shown to the operator in case the conditions are satisfied.
If an assertion step generates an error message, the operator is automatically returned to the most recent user step.

# Assignment
### 
Use the assignment to create one or many new variables and assign values to them. It is possible to use Flow script to assign a value to the variable.
See [FlowScript expressions](/6.11/development/flow-studio/flowscript/variables)
# Table
### 
A table is used to make internal tables with stored data just for that specific workflow.
# Checkpoint
### 
A checkpoint will notis the user with the message that is configurated in the checkpoint step.
* **Title:** Enter a title for the message.
* **Text:** Enter a text for the message.

# Split
### 
Use the split task to split....

# Join
### 
Use the join task to join task from differnet swimlanes.

# Script item
### 
This item is used to execute a FlowScript program and assign the target variable with the script result.
See [FlowScript programming](/6.11/development/flow-studio/flowscript)

# Log point
### 
The log point can for example be used to measure time or debug workflows. Log points capture the value of the checked variables and can be stored in a database thru a connected workflow in system events.
Download a basic log point workflow and a Sql server database here:\
[Log Point Workflow - Sql Server 2012](https://home.novacuraflow.com/Downloads/Customer/Example/Log%20Point%20-%20Sql%20Server%202012.zip)\
[Log Point Workflow - Sql Server 2014](https://home.novacuraflow.com/Downloads/Customer/Example/Log%20Point%20-%20Sql%20Server%202014.zip)
* If needed Sql server express can be downloaded here:
* [Sql Server 2012 Express](https://www.microsoft.com/en-us/download/details.aspx?id=29062)
* [Sql Server 2014 Express](https://www.microsoft.com/en-US/download/details.aspx?id=42299)
* Restore the database backup in sql server express management studio.
* Create a connector to the database.
* Import the [machine workflow](https://home.novacuraflow.com/Help/latest/?help_root_applications_workflow_workflow) (LogPointWorkflow) in the Flow studio.
* In [*Environment*](https://home.novacuraflow.com/Help/latest/?help_root_environment_environment) -> [*System Events*](https://home.novacuraflow.com/Help/latest/?help_root_environment_system_events), pick the machine workflow (LogPointWorkflow) for the log point system event and choose a user that will execute the log point system event.
* Now should data be logged when the workflow steps over a log point.

\
**1.** Create a [machine workflow](https://home.novacuraflow.com/Help/latest/?help_root_applications_workflow_workflow). This workflow will run every time a workflow steps over a log point.
* Use imparameters to get the log point data into the [machine workflow](https://home.novacuraflow.com/Help/latest/?help_root_applications_workflow_workflow). Download the example above to see how the imparameters should be configured or look at the picture of the workflow below.
* Create a record variable named *LogPoint*, with variable; *Name*, *TimeStamp*, *WorkflowName* and a table *Data* with variable *Key* and *Value*.
* Use a connector to the database where the logged data will be stored. Download the example above to get a database (other types of databases can also be used).

**2.** Go to [*Environment*](https://home.novacuraflow.com/Help/latest/?help_root_environment_environment) -> [*System Events*](https://home.novacuraflow.com/Help/latest/?help_root_environment_system_events), and pick the [machine workflow](https://home.novacuraflow.com/Help/latest/?help_root_applications_workflow_workflow) for the log point system event and choose a user that will execute the log point system event.

**3.** Add log points in workflows to log data.

# Annotation
### 
Use the annotation element to add a comment to the workflow. The comment is not visible to end users.

# End step
### 
The end step represents where the workflow is ending. It's possible to have one or multiple end steps in a workflow. Double-click on the end step to edit the output variables or linked workflows.
#### Linked workflow
Linked workflow is used to connect a workflow to an existing one. The linked workflow will be runned after the original workflow. Go into the end step to configure the linked workflow.
* **Pick:** Select a created workflow
* **New:** Create a new workflow
* **Clear:** Clear the added workflow
When adding a machine workflow it's possible to configure "linked start variable mapping". It's possible to add input and query settings.

# Included workflow
### 
A workflow fragment is a type of workflow that can be reused in serveral user workflows. Use the Included Workflow step to connect a workflow fragment to a user workflow.
Create a workflow fragment by clicking on File in the main menu and choose New, choose type Workflow fragment.

Develop the fragment workflow as wanted. Enter variables in the start step to get input parameters to the fragment workflow and select the output variables in the end step. A fragment must have an end step otherwise there will be an error in the workflow.
# Offline resource
### 
Use an *Offline resource* to make data available in an offline workflow. When an offline resource is used, the button *Offline data* will be available in the clients. Under *Offline data* can the end user download data to the local device that will be used when executing offline workflows. For every *Offline resource* used in workflows available for the end user will one row show up under *My offline data*.

\
Use an *Offline resource* to get data in offline workflows.

\
Create a machine workflow that fetches the data needed and connect the *Machine workflow* to the *Offline resource*. The *Machine workflow* must be created as an *Offline resource*.

Use the output variable from the *Offline resource* to use the data from the *Machine workflow*.

# Public variables
Public Variables are visible from outside the current workflow, and are used to provide instance-specific information when configuring the template for an Inbox.
To create public variables:
1. Navigate to metadata in your workflow.
2. Open the panel for public variables.
3. Create a new public variable.
4. Choose a name for the new public variable.
5. Confirm and create the new variable.

To assign a value to the public variable:
1. Navigate to Workflow->Public Variables
2. Click on public variables.
3. Select your public variable and map it to a system variable.
4. Press ok to save changes.

# Swimlanes
Use swimlanes to involve several users in one flow execution.
The swimlanes can be configured so only a specified role can access a specific swimlane, the remaining swimlanes will still be accessable by the default menu role.

### Configuration
The swimlanes can be configured to work online, online & offline, offline, or machine.
When using an offline swimlane, the same restrictions apply as when using offline workflows. You need to fetch the data before going offline, and the transactions will be stored and executed first when you go online again.
In configuration one can also assign names to the swimlanes, access roles and swimlane colour.
### Crossing Swimlanes
When crossing swimlanes there will be an swimlane crossing event, in this event you can configure what will happen when the crossing happens.
Task name is the name of the task that is handed over to the recipient.
Push notifications enables iOS & Android client to notify the recipient when a new item is handed over to their inbox. Recipients is where one can select who receives these notifications.
Override Recipient is where you can choose a specific flow user or all users belonging to a role to get this push notification.
### Split/Join
When working with swimlanes, sometimes parallel user inputs need to be made.
To do this, use the workflow element "Split" to split the executions into to parallel workflows, this way the original user can continue working in the workflow while the new user works on their swimlane.
When the new user is done you can use "Join" to join the two parallel executions into one again.

# Offline workflow
**Two different levels of offline:**
**Built-in semi-offline:**
* The fat clients only need connectivity when passing a cogwheel.
* Seed inbox items are downloaded and can be accessed without connectivity.
* Less network dependency and better mobile performance.
* Push cogwheels to the start and end events ? and you can be offline in between.
**Constant offline:**
* Offline Resources are used for supporting data (User Info, Equipment Structures, Lists etc.)
* Machine Swimlanes executes cogwheels on the server.
* A background job on the client handles data and transactions whenever there is connectivity.
* The user do not have to think about going online or offline.

# Create an offline workflow
When developing an offline workflow, all machine steps that writes data to a system must be placed in a machine swimlane to be able to create offline transactions; start with creating a regular User workflow.\
Add one swimlane to the workflow with the plus sign. Change the mode for one of the swimlanes to offline and the mode of the other swimlane to machine.

# Create an offline resource
Use an *Offline resource* to make data available in an offline workflow. When an offline resource is used, the button *Offline data* will be available in the clients. Under *Offline data* can the end user download data to the local device that will be used when executing offline workflows. For every *Offline resource* used in workflows available for the end user will one row show up under *My offline data*.

\
Use an *Offline resource* to get data in offline workflows.

\
Create a machine workflow that fetches the data needed and connect the *Machine workflow* to the *Offline resource*. The *Machine workflow* must be created as an *Offline resource*.

\
Use the output variable from the *Offline resource* to use the data from the *Machine workflow*.

# Create an offline seed inbox
Seeded inbox can also be fetched from an offline resource. Create an offline resource and connect a machine workflow that fetches the data needed for the seed inbox. Add a machine step and connect the machine step to the start event with a data arrow. In the machine step refer to the output of the offline resource.

For every fetched row will an inbox item appear in the inbox.

Read more about how to setup a seeb inbox [here](/6.11/development/flow-studio/applications/menu/inbox).
# Create an offline transactions
All machine step that writes data to a system must be placed in the machine swimlane in the offline workflow. It is possible to either use the split step or end the workflow in the machine swimlane. A transaction will be created for every swimlane crossing that is executed.


# Subscribe
The subscribe function is used to share applications between different Flow environments. This makes the transition of workflows from test to prod very simple.
We recommend that applications are developed in a dev/test environment, and subscribed in the production environment.
### Share
Share the workflow by clicking on the share icon, right to the edit and publish.\
Enter a comment and click on share, and copy the url.
> The workflow need to be published to be able to be shared.
####
### Subscribe
Subscribe to an application by right-clicking in the server contect panel area and choose subscribe.

\
Enter the copied url for the application that should be subscribed and click OK.\
Subscribed workflows will get a specific icon as in the below picture.

> It is not possible to edit subscribed workflows.
####
### Update to new version
When a shared workflow is updated and published with new functionality to a new version, click on the share icon and enter a comment and click share.\
The new version of the application will now be available in all environments where it is subscribed.

In the environment where the application is subscribed will the application get a star icon, indicating that there is a new version avalibale.\
Right-click on the application and choose update. This will update the application to the latest version.

# Server content
The Server content panel shows the server content that is stored on the currently connected server. Content can be folders, workflows or menus.
To create new content right click anywhere and select *New\...* from the context menu. To move the contents, drag and drop the content onto the folder that it should be moved to.
**Export:** To export an item and save it as a file, right click on it and choose *Export*. You can export a single workflow or menu, or right click on a folder to export everything in the folder.\
An exported workflow will get suffix .flow, a menu will get suffix .mflow and a folder will get suffix .wap.
**Import:** To import an exported item, right click in the server content panel and choose *Import*, or choose *Import to server* from the *File* menu. Novacura Flow 6 supports import of workflows from version 5.10 and above.

\
\
 \
**Folder:** A folder can contain different types of workflows and menus.\
\
\
 \
**Workflow:** A regular workflow. The icon is grey when no one is working with it. The icon is blue when the logged in user has the workflow in edit mode. When another user is working on the workflow, it will show a padlock icon.\
\
\
\
**Machine Workflow:** A machine workflow. The icon is grey when no one is working with it. The icon is blue when the logged in user hae the machine workflow in edit mode. When another user is working on the workflow, it will show a padlock icon.\
\
\
 \
**Workflow Fragment:** A fragment workflow, and the icon is grey when no one is working with it. The icon is blue when the logged in user have the fragment workflow in edit mode. When another user is working on the fragment, it will show a padlock icon.\
\
\
 \
**Menu:** A menu needs to be configurated to make workflows available in the clients.
# Workflow scheduler
Machine workflows and User workflows\* can be started from a schedule in Novacura Flow. This is useful when a workflow should be run at a certain time or/and with a certain recurrence. This function is suitable when moving data between systems or doing system checks that may result in user tasks.
All scheduled workflows which will be ran in the future are indicated with a clock icon in server content panel. Each scheduled workflow saves a last run status which is shown in the configuration windows. This windows can be found in the server content context menu for each workflow, i.e. Right click on the workflow and select *Schedule...*.

{% hint style="info" %}
User workflows must start in a machine swim lane but can later do a handover to an end-user.
{% endhint %}
### **Configuration**
* **Machine User**: Sets which machine user account that will be used when executing the workflow.
* **Repeat every**: Sets the repeat interval (if any). The start point is used for calculating the cycles.
* **Start**: Date and time for the first execution.
* **End**: Date and time for when the execution should stop repeating. This will not stop any started executions.
* **Enable**: Sets if the scheduling is active or not.

> Note: This function is depending on the Novacura Flow windows service which is installed along with all Novacura Flow server installations. This service will check for scheduled workflows on a 10s interval, which means that the granularity can never be more precise than 10s.
### **Tips**
More complex repeat patterns can be achived with FlowScript that restrict the execution. For example running a workflow every Monday, Wednesday and Friday at 03AM can be achived by settings start time to 03AM and repeat interval to 24 hours. The workflow should then start with a decision step that checks which day it is. See example below.

### **Best practices**
Avoid long running workflows. Workflows can never be run longer than 60min and each machine steps should never take more than 100s.
Don't run multiple instances at the same time. If a workflow take more time (in worst case scenario) than the repeat interval then it will start parallel executions which may result in unexpected behavior.
### **Troubleshooting**
If a workflow wasn't executed as expected follow these steps:
1. Check the status field, if the execution ended in an error that should be stated here.
2. Workflow should have a clock icon, or else the configuration is incorrect.
3. Press *Run now\...* to see that it can be executed with that user and has a published version.
4. Make sure that windows service is running and correctly configured.
5. Change log level to *info* on Novacura Flow server and wait for next execution.
# Generate link
Generate link helps the user to construct a link to execute a workflow. This is supported for both User Workflows and Machine Workflows. Generate Link is located in the context menu in server content panel.
### User Workflows
User workflow links points to the web client and provides a direct link to a workflow execution.

* **Web Client Url** this field should contain the url to the web client.
* **Execute Only** locks the user to the execution view and prehibit the user from quiting the workflow or returning to a menu after execution.
* **Public User** this option configures a public user to run the execution, when a public user is selected no credential prompt will be displayed.
* **Parameters** this sections show the input variables that are configured in the start event of the workflow. Only simple variables can be used in user workflows.
### **Mobile Link**

User workflow links points to the mobile client and provides a direct link to a workflow execution.
* **Parameters** these sections show the input variables that are configured in the start event of the workflow. Only simple variables can be used in user workflows.
### Machine Workflows
Machine workflows can be executed over http request. These request are made directly to the flow server. The workflow is executed by a machine user and authentication is made by basic authentication.

* **Method** supported methods are POST and GET, POST supports complexe structures as input and GET only supports simple variables feetched as query string values.
* **Server URL** url to server, must be accessible from where the request is made.
* **Input** in this section all simple variables are shown and provides a help function for constructing the input parameters. In POST requests the input should be sent as JSON in body content and GET should send input variables as part of the url.
# Elements
From this panel, elements can be dragged to the workflow canvas. Find more about the elements under [Workflows](/6.11/development/flow-studio/applications/workflow).

> *Tip* The panel adjusts its layout to its size; experiment with different sizes!
# Problems
The Flow Designer will check the workflow for possible errors at regular intervals (or if the F5 key is pressed). Errors are displayed in a list which as of default is located below the workflow, and workflow steps with errors are rendered with a red background.
Workflows with errors can not be published. Workflows with warnings can be published but is not recommended.
Most type of errors/warnings can be double clicked and it will highligt the failing step. Some errors/warnings is related to more than one step and in that case a search will be performed when double clicking that row, the search result will be shown in the [Find Panel](/6.11/development/flow-studio/applications/find)

# Find
This panel can be used to search in the active workflow. Do a search by entering a search term in the search text field and pressing the search button or the *enter* key. The search results will be displayed in the list below the search field. The search function will search in workflow items and their configurations (including scripts). Note that each workflow item will only be displayed once in the search result (even if it has more than one occurrence of the search term).
The checkboxes in the upper left corner can be used to filter the search result. For example, in the screenshot below, we have filtered the search to display only variable assignments and usage of variables containing the phrase *workOrder*.

> *Tip* Double click a search result item to navigate to that item, works even for items in sub workflows.
# Metadata panel
# Version panel
Start a new workflow version by clicking the *Edit* button, this will lock the workflow and prevent other users from starting new versions. To indicate edit mode, the [server content](/6.11/development/flow-studio/applications/server-content) shows a blue icon to the current user and a lock icon for other users.
When editing a workflow in edit mode all changes will be saved to the server automatically. In the case when the server can not be reached changes will be saved to local copy and uploaded when server is available. When the changes of the workflow are done click on the *Commit* button. The commit button is enabled once there is a change in the workflow. If no change is required for a workflow in edit mode, click the *Revert* button to go back to the previously committed version.
At commit it is possible to enter a commit message. The commit message is option but is possible to make mandatory by ticking the Force Commit Message box in the workflow metadata.
When a new version is committed is it possible to publish the new version and make is available for the end-users by clicking on the *Publish* button.
 - Edit button\
\
 - Commit button\
\
 - Revert button\
\
 - Publish button\
\
The version panel will show a list of versions. Any version can be opened by double click. Each version can be in a number of different states.

In order to create a new version that is based on a historical version just open the old version and click the *Edit* button. This will be shown as a break line. In the example below *Version 3* is based on *Version 1*.

#### Archive
When a workflow has more than five (as default, this can be adjusted in the server configuration) versions only the five latest versions will be shown and loaded as default. This enables faster loading since older versions are achieved. Double click on *Load all versions* to load and show all previous versions.

# Navigation
Navigation panel shows an overview of the active workflow and provide a rapid way to navigate in the workflow by dragging the camera around to change view.

# Test bench
Test bench is a powerful tool for dynamic workflow analysis, making it possible to detect errors, problems and misbehaviours. By using it, you can follow the execution of your workflow step-by-step with live information about all used variables, inputs and tasks.
Test bench panel is divided into two areas: on the left there is a simulation how the step will be presented in the clients; on the right there is a panel with variables available in this step with their values.

User can start the test bench by clicking on the **Play** button in the top right of your workflow window. Current element being debugged is highlighted on yellow, if two or more swimlanes are present both paths are being highlighted and user can switch between them by choosing proper tabs in the test bench.
When using several swimlanes, the test bench can impersonate as another user in the other swimlane(s) from this window that shows up when the workflow moves to another swimlane

User can go to the next step by clicking the button on the preview window. If step requires some action (eg. demands user to provide some text) you cannot move forward without providing it, just like in real execution. By providing different inputs and data user can test the workflow to make sure it works as it is expected.
If two or more swimlanes are present some steps must be completed before others to make it possible to move forward. Test Bench will prompt the user if action on another swimlane is needed.
Test session can be stopped by going through the workflow to the end or at any time by clicking the **Stop** button on the top right corner of the workflow.
# Application package
{% hint style="danger" %}
Application package will be deprecated. That means the features are still available, but we do not recommend implementing if not already used.
{% endhint %}
Application Package is a way to package, license and lock specific solutions.
A package can contain workflows, package roles, package properties and portal tabs and can, if licensed, be used by users connected to user type FullUser and AppUser. If the package is unlicensed, it is available to FullUsers.
## Package settings
### **Metadata**
Icons and Theme color: Select the icons and banner color for the package.
* *Name:* The Name of the package
* *Application Package ID:* The ID of the application package. This ID is when licensing the package.
* *Package Short Description:* Enter the description for the package here
* *Create by User:* The Flow ID of the user that created the package
* *Date Created:* The date the package was created
* *Package Owner:* Editable field into which the package owner can be entered. This is useful
* *Copyright:* Editable field for copyright
* *Environment Origin:* The name of the environment on which the package was originally created
* *Original Flow Version:* The Flow version on which the package was originally created
* *Business Segment:* Possible to set business segment for the package, drop down list
* *Process:* Possible to set process for the package, drop down list
### **Connectors**
The connectors tab defines which connectors can be used in the package. The technical set up of a connector is still done in Environment - Connectors, the package only contains a mapping.
* *Name:* The name of the connector. This name is what is seen in the connector drop down list when creating or moving workflows into the package.
* *Type:* The type of connector. Value if fetched when mapping the connector.
* *Mapped name:* Drop down list showing all connector available to be selected from. Once added, it is possible to change the mapped connector but only to connector of the same type.
### **Roles**
The Roles tab shows the package access roles. The roles can be added, removed and edited. The roles structure is the same as in the rest of Flow, with a group ID and roles connected to the group.
### **Properties**
Package specific properties are added removed and edited in the Properties tab. A package property is set up the same as in Environment - Properties but are only available within the package.
### **Portal Tabs**
The portal tab shows the Flow Portal tabs connected to the package. Portal tabs can be added or removed. It is only possible to connect whole portal tabs to a package, not individual portlets.
### **Workflows**
Application package workflows are created the same way as normal with the difference that the available connectors are only the ones defined in the Package Settings - Connectors tab. Workflows can be dragged and dropped into a package, the user is then asked to map the connectors used in the workflow to the ones package settings.
### **Menu**
A package can contain one or more menus. A package related menu is configured the same way as a non-package menu, ie workflows and inboxes can be added, and roles connected. The roles available for a package menu are the ones defined in package settings.
Workflows however, are not just limited to the ones in the package but all workflows can be added. An info message is displayed to notify the user if a workflow is not in the package - ?Add external workflow to package menu?, yes or no will either add the workflow or about the action. Package workflows can also be added in external Menus.
### **Folders**
A package can contain folders in multiple levels. All workflows and menus in the folders will belong to the same package and have the same package settings data available.
## Package Actions
### **Import and Export**
A package can be exported and imported using the right mouse button options in the navigator.
* *Export:* it is the that package content that is exported. External workflows connected to a menu will not be included in the export. All workflows in the package must be committed and published before the package can be exported.
* *Import:* at import, the user will be asked to map all package connectors. If the package already exists, the user gets the options to replace the existing package or to create a new. New packages created will get a new package id. The rest of the metadata remains the same.\
\
If a new package is created and the original package contains portal tabs, the portal tabs are not duplicated but the mapping is to the same tabs as the original package.
Individual workflows are exported and imported outside the package.
The application package only contains connector mappings and not the full connector. Before importing into a new environment, it is recommended to check that all relevant connectors exist.
### **Lock**
An application package can be locked by right mouse clicking on the package, selecting Lock. All workflows in a package must be committed before it can be locked. Any package content open in the studio will be closed when the package is locked.
If a package is locked it is not possible to open workflows or change metadata.
For a locked package the following is still editable:
* *Menu:* add and remove workflows, inbox and category
* *Menu:* add and remove package roles
* *Package settings - Connectors:* possible to change the connector mapping to enable the customer to maintain connect settings themselves
A locked package is exported and imported as locked.
If importing into an environment where the package id already exists, the user will not get the option to create a new package but only the possibility to replace the existing one.
### **Forgotten password**
It is possible to unlock the package for which the password has been forgotten. Contact support for assistance.
# Get started
How to create an Application package
Here is a short explanation of how to create an application package. Create new package by clicking right moutse button and select New - Package.\

The package folder and package settings are created.

Change the package metadata.

Add connectors.

Add roles.

Add properties.

Add portal tabs.


Create workflow in package.

Only the connectors defined in package settings can be selected in the workflow.

The package property can be used in the workflow.

In the package menu it is possible add workflows that is not included in the package. If this is done, the user gets a warning message. External workflows are not included when exporting. Warning message:

Add roles to the menu. Only package setting roles are available to be selected.

Drag and drop workflow as workflow into the package. Connector mapping is requested.

Export warning when menu contains workflow that is not in the package.

Export when workflows not published.

Import of existing package.

Connector mapping when creating new package at import.

Lock package.

Enter and confirm password.

Package locked.

Unlock package


# Environment
The environment tab is used to adminstrate properties and values which is common for all workflows and creates a context in which the process platform can execute. Users with *type* *AdministerBasicData* can access this tab.
# Users
A Flow users can either have access level administor, designer or client. In combination with *Type* will the user have different limitations of running workflows.
Information about how many users that is available can be found under [license](/6.11/development/flow-studio/environment/license).
To add a new user click on *Add* in the top-right corner, it will appear a dialog to the right where it is possible to add the new user.

* **Name:** Enter the name of the user.
* **Active:** This indicates if the user is in use or not. Only active users will be counted towards license usage.
* **E-mail address:** Enter an e-mail address for the user.
* **User id:** Enter a user id.
* **Access level:** All users can run applications but if the users should be able to administrate the environment or design workflows they need to have access level administrator and/or designer.
* **Administrator:** With this access level can the user administrate the environment and design workflows, for example add/edit users, roles, connectors and add/edit workflows.
* **Designer:** With this access level can the user create and edit workflows in the designer tool.
* **Group:** Group is used for grouping users in the users list.
* **Type:** Choose the type of the user.
* **Full user:** A full user can log in and run all licensed clients including the portal.
* **Workflow user:** A worklow user will only have permission to run specific granted workflows.
* **Machine user:** A machine user can only run machine workflows, read more about machine workflows [here](/6.11/development/flow-studio/applications/workflow).
* **Transaction user:** For every workflow that is started will a transaction be counted.
* **Portal user:** A portal user will only have permission to log in to the portal client.
* **Public user:** A public user can run a workflow without the need to log in.
* **App user:** A user type for application packages.
* **Password:** If the user should have a specific Flow password then enter a password for the user in this field otherwise leave the field empty.
* **Language:** Enter a value to set the default language for the user. If the field is left empty the following language will be used:
* Andriod, iOS and UWP - device language
* Web and Portal - language depends on the browser:
* Chrome - Language is taken from the first language in the list of defined languages in the browser settings.
* IE/Edge - Language is taken from the display language set in Windows.
* **Culture:** This settings is for Portal and Web only; Enter a value to define which culture is to be used for date formats. If culture is left empty or set to Not Specified the formats will be based on the user language.
Andriod, iOS and UWP will use device settings for date formats regardless of Culture being set on the user or not.
* **Role tags:** Roles give the user access to menus and the content of the menus. Choose those roles the roles that the user should have permission to.
* **Properties:** Enter values for any properties, read more about properties [here](/6.11/development/flow-studio/environment/properties).
* **Connectors:** Enter username and password for connectors, read more about properties [here](/6.11/development/flow-studio/environment/connectors).
**Related pages:**
{% content-ref url="/pages/-LucD3DwRGeVTtmBHldF" %}
[Roles](/6.11/development/flow-studio/environment/roles)
{% endcontent-ref %}
{% content-ref url="/pages/-LuPWlCqEHuEIYLf1qw0" %}
[Menu](/6.11/development/flow-studio/applications/menu)
{% endcontent-ref %}
# Roles
Roles is used to categorize users in different ways and could be used for different purposes in Flow.\
Roles can for example be used to describe an organisational structure or to reflect different types of access groups.
A User can be connected to one or many Roles. In order to structure the roles, many different Role Trees can be created.\
There are two types of inheritance methods for each Role Tree; Inherit Children and Inherit Parent.
Workflows and inboxes are added into menus, roles are connected to menus and users get roles, and by that users getting access to workflows and inboxes.

1. Select a role group from the list to view and edit the information or click on *Add* in the top-right corner of the roles list to add a new role group.
2. When a new role group is created, enter a Group id and a Group name.
3. If the Roles group should Inherit Children, check the check box (Inherit Parent is default).
4. Click on the + button to add a new Role, a new role named New role will appear, rename the role by double-click the new role.
5. It is possible to add levles of roles, add another level by marking the role and click the + button, a new roles named New role will appear, double-click to rename the roles.
{% hint style="info" %}
**Tips:** Delete a role by marking the role to delete and tap delete on the key board.
{% endhint %}
**Connect the role to one or more menus and users, read more about menus and users here:**
{% content-ref url="/pages/-LuPWlCqEHuEIYLf1qw0" %}
[Menu](/6.11/development/flow-studio/applications/menu)
{% endcontent-ref %}
{% content-ref url="/pages/-LucCtMtJ8mZrRqHFrtI" %}
[Users](/6.11/development/flow-studio/environment/users)
{% endcontent-ref %}
# Connectors
With connectors can Flow integrate with different systems, databases and services.
When a connector is configured will it be used when creating workflows in the Flow studio and when executing workflows from a Flow client. For each type of connector there is a unique configuration that specifies how to connect to the specific system, database or service.
#### Update the Flow License
After ordering a connector license from Novacura or your local Partner, open the Flow Studio and go to Environment/License. Press the Update License button.

Make sure that the license is allowed in the list of connctors:

The connector is ready to be configured.
#### Setup a new connector
To add a connector click on Add in the top-right corner and choose type and enter a name of the connector.\
See specific setup for the connectors under Connectors in the menu tree structure.
Read more about connectors [here.](/6.11/development/flow-studio/connectors)
# Properties
A defined property can be used from the Flow designer as a constant in the workflows and thereby be used to define different business logic depending from the value of the property.
A property can exist in two different scopes or contexts:
* **Global:** the property is valid for the Environment that the User logs in to.
* **User:** the property is valid for the logged in user.
Enter the value for the environment properties under Environment in the menu. Choose the environment you what to add properties to and press the cogwheel to modify the environment information. Go to tab Properties and fill in the environment data. Enter the value for the user properties under Users in the menu. Choose the user you what to add properties to and press the cogwheel to modify the user information. Go to tab Custom Properties and fill in the user data.
# Languages
Flow administrators have access to add and remove languages. The added language can be used when designing workflows and can also be selected from the clients to get a preferred language on the whole client.
To add a new language, click on *add* and then select a language from the drop-down list.

To remove a language, click on an added language and then click on *delete*.
# System events
It is possible to connect a machine workflow to a specific event that occurs on the Flow server.
Examples of this can be when a user is added to Flow a machine workflow that sends an email to the user will be executed, or when a user steps over a log point in a workflow a machine workflow will be executed that commit the data to an appropriate data source. Connect a workflow to a system event by either *Pick* an already existing machine workflow or click on *New* to create and connect a new machine workflow. Choose a user that will be the executer of the machine workflow.
> Observe that only machine users will appear in the list of users that can execute a system event.
> Create system event workflows with the *New* button to get event specific parameters generated in the start step.
System events that is possible to connect a machine workflow to:
* **Start workflow:** The machine workflow will be executed when all workflows is started.
* **End workflow:** The machine workflow will be executed when all workflows is ended.
* **Add user:** The machine workflow will be executed when a user is added.
* **Remove user:** The machine workflow will be executed when a user is removed.
* **Log point:** The machine workflow will be executed when a log point is stepped over in a running workflow application, read more about log points [here](/6.11/development/flow-studio/applications/workflow/log-point).
* **Handover:** The machine workflow will be executed when the workflow hands over to another swim lane.
* **Device Status Changed:** The machine workflow will be executed when a new device request is sent to the Flow environment, read more about device management [here](/6.11/development/flow-studio/environment/devices).
* **Help Request:** The machine workflow will be executed when a new help request is registered, read more about help request [here](/6.11/development/flow-studio/monitoring/help-requests).
# Active directory sync
Here you can set up syncing from Active Directory to Flow Users.
Click Add Group to add a new mapping, mapping is done from Active Directory group to Flow Role. When all groups have been added click Sync to begin syncing from Active Directory Users to Flow Users.
Everytime Sync is clicked all previous synced users are removed from Flow and new users are created to match current Active Directory status.
See [FlowScript](/6.11/development/flow-studio/flowscript) and [Active directory sync](/6.11/development/flow-studio/environment/active-directory-sync)
Enter the relevant information for which AD that is to be used in the configuration and set the timing as to when the syncronization is to run. For Azure ID the id can be with our without domin. For customers with multiple domains, the inclue domain box should be ticked to avoid problems with users with the same name on differnt domains.


# License
To be able to run *Novacura Flow* a license will need to be issued.
There are two types of licenses:
* **Demo license** - *a trail license allows you to test and use all the features in Novacura Flow for a limited amount of time*.
* **Customer license** - *a regular license that includes the parts of Novacura Flow that is purchased*.
#### Demo license
Request a demo license by clicking on the *Create demo license* button, enter the required information and click *Submit demo license request*. An email with the license key will be sent to the contact email adderss.
Enter the license key into the field and after pressing the *Create demo license* button the license will be created and stored on the server.
If you did not get a license key, please do the following:
* Check if the message was not put into the spam folder. To prevent it next time, add Novacura to your mailbox trust list.
* Make sure you have provided a valid email address in the info section. If not, type the correct one and send the request once again.
* Make sure you are allowed to receive messages from Novacura, contact your mailbox provider if it is blocked.
* In case of other problems, please contact Novacura Support, .

#### Customer license
When the customer license key is recived, please do the following:
* Start the *Novacura Flow studio* and log in to the *Novacura Flow server* that should use the license key.
* Go to Environment -> License and click on *Create customer license*.
* Enter the received license key to the license key field and click on *Create customer license*.
* When a message *License saved!* appear is the license saved to the *Novacura Flow sever*.
#### About the license service
In the first of every month will the *Novacura Flow service* send a usage file with information about how many users that is used on the *Novacura Flow server*. The address ** need to be reachable from the machine where the *Novacura Flow* is installed, so the *Novacura Flow service* can call home and check if the license is valid. If it is not possible to open up for **, the license will need to be manually updated through the *Novacura Flow studio* every month.
> It is possible to enter as many users as wanted to *Novacura Flow studio* but if the license is exceeded a massage will be showed in the *Novacura Flow studio* and an email will be sent to Novacura with information that this license is exceeded. Novacura will control how many users that is used after the usage file have bin sent and if the license is exceeded will Novacura contact the customer. To buy more users and connectors please contact your Novacura sales contact.
#### Check the following when license is not updated automatically:
1. Do the server have contact with Flow home? Run in a browser on the server.
* If the Flow logotype shows up then is the server connected. Jump to step 2.
* If there is no connection, then must internet connection be turned or opened up for Flow home to make the license service work.
2. Is the server address correct in the Flow service config file? Open the .config file in the Service folder under the Flow installation. Make sure that the address is the correct Flow server address for the installation, copy the address and run it in a browser on the server to make sure that it works.

**If the server address was incorrect, do:**
* Change the address in the .config file to the correct address and remove the date and time for License\_LastTime, save the .config file.
* Go to Services and find the Flow service and first stop and after that start it again. (the service have the same name as the environment).
* Wait some minutes, and open the service .config file and check of License\_LastTime is updated with the current date and time. If it is updated, log in to Flow studio and check if the license is updated, next renewal date should be next month.
* If this is not working go to next step.

**If the server address was correct, do:**
* Open the Service/log folder under the Flow installation, and send the logs to to look at them (logs are only available from version 6.3).
# Devices
With the built-in Flow Basic Mobile Security Management all connected mobile devices can be overviewed and managed directly in the Studio or via a workflow.\
If *Device Management* is enabled for the environment all new devices that tries to log in to the environment need to be approved before the user actually can log in to Flow via a mobile client. In the same way existing devices can be blocked if, for example, a device is lost or replaced.
Devices that are unhandled will have status *New* and an administrator can either *Approve* or *Block* the device. Every time a user logs in from an approved device will the *Last User* field be updated with the latest logged in user.

Until the device is approved the client user will get the message *This device has yet to be approved by a system administrator*.

If the device is blocked the client user will get the message *This device has been blocked by a system administrator*.

#### System event
With the system event *Device Status Changed* it is possible to automate some of the device management and for example alert administrators with an email if a new device is connected.
> Use the Flow environment connector and the functions related to *Device management* to for example approve or block devices via a workflow.
Read more about system events [here](https://home.novacuraflow.com/Help/latest/?help_root_environment_system_events).

#### Common questions:
**How to activate or deactivate device management?**
Menu selection Device will only appear in the menu if device management is activated for the connected Flow server.
* *Go to the Flow server installation folder*
* *Edit the web.config file*
* *Change the value of useDeviceManagement to true if device management should be used and false if device management should be turned off*
**Is device id the IMEI number?**
No, the device id is generated from an OS-specific API made for the purpose.\
Devices with iOS will generate a new device id if the Flow app is reinstalled.
# Branding
Branding is only available in the Enterprise version of Flow.
## Logotype
Change the logotype shown in the left corner of the Flow clients. Click in the up load icon and choose a new logotype.

## Color theme
With Color Themes is it possible to change colors on the client banner, workflow buttons and the header text.
Add a new theme by clicking on Add and enter a name of the theme, change the colors and save theme. Activate the theme that should be used by Flow.

Create your own color palette and use as backgrund colors for the workflows.

\
With the color picker is it possible to change the colors. Click on the color that should be changed and either enter RGB, hex code or choose a color from the color palette.\
The workflow colors will apply in the palette where to choose workflow color from. If workflow color 1 is changed will all workflows using that color be changed to the new color, and the same with the other workflow colors.

---
[Next Page](/llms-full.txt/1)